How to use ChatPion’s outstanding feature ‘Comment automation’?
ChatPion, brought to you by XeroneIT, is the world’s best marketing-related software. It is a multi-user, white-label and SaaS software. This web-based application is made of different unique features. Besides, it has several remarkable add-ons, such as WordPress & YouTube Feed Auto Post, Email & SMS Sequence Campaigner, WooCommerce Abandoned Cart Recovery Plugin, Group Posting Tools, Messenger Bot Connectivity, Messenger Bot Enhancers, and Comment Reply Enhancers. Added to ChatPion, these add-ons increase the functionality of the marketing application in various ways.
ChatPion and Comment Reply Enhancers, an add-on of ChatPion, together turn out to be a striking feature called ‘Comment automation’. This feature can comment under posts and reply to comments automatically on Facebook page— it can tag commenters in the replies. This feature can make text-only auto comments. But it can make text-only, image and video auto replies. Also, it can hide and delete offensive comments and can send private replies to the respective commenters. Likewise, it can send private replies to commenters— This fantastic feature can send different types of private replies — Text, Audio, Video, File, Quick Reply, Text with buttons, Generic Template, Carousel, Media and One Time Notification.
It can also like and share spontaneously all and selective posts of the entire page.
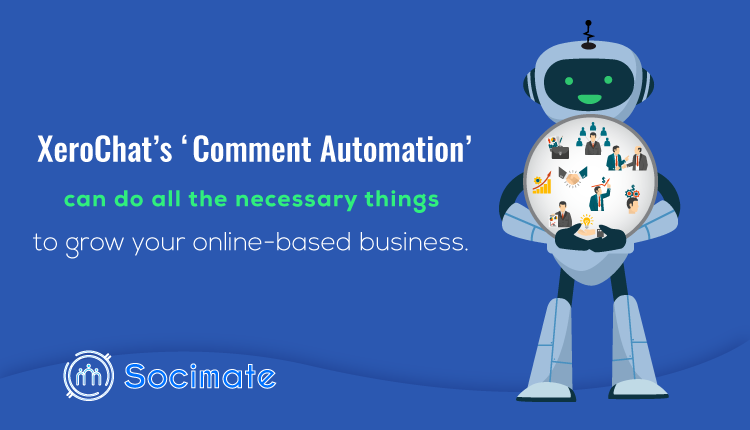
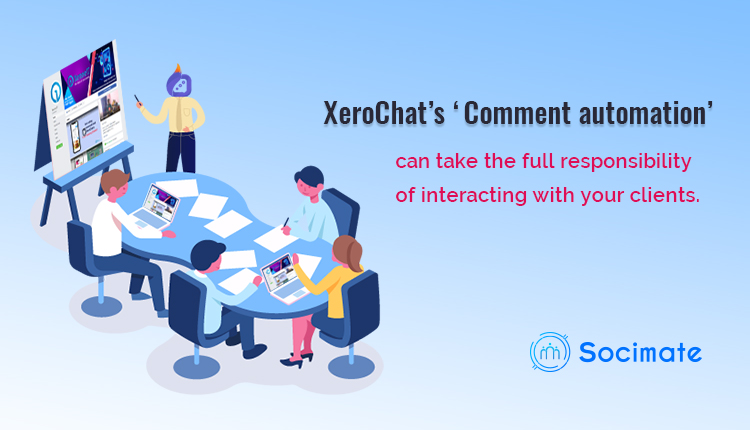
ChatPion’s ‘Comment automation’ can take the full responsibility of interacting with your clients.
The feature is easy to use. Just read the article and follow the commands, and ‘Comment Automation’ will be set to work instantly. Once the feature starts working, it will continue without your supervision until you stop it. The feature will take the full responsibility of interacting and dealing with your valuable clients via Facebook page.
How to use ‘Comment Automation’:
First, you have to import your Facebook account to make your ChatPion workable. After you have imported your Facebook account, go to the left panel of the ChatPion Dashboard.
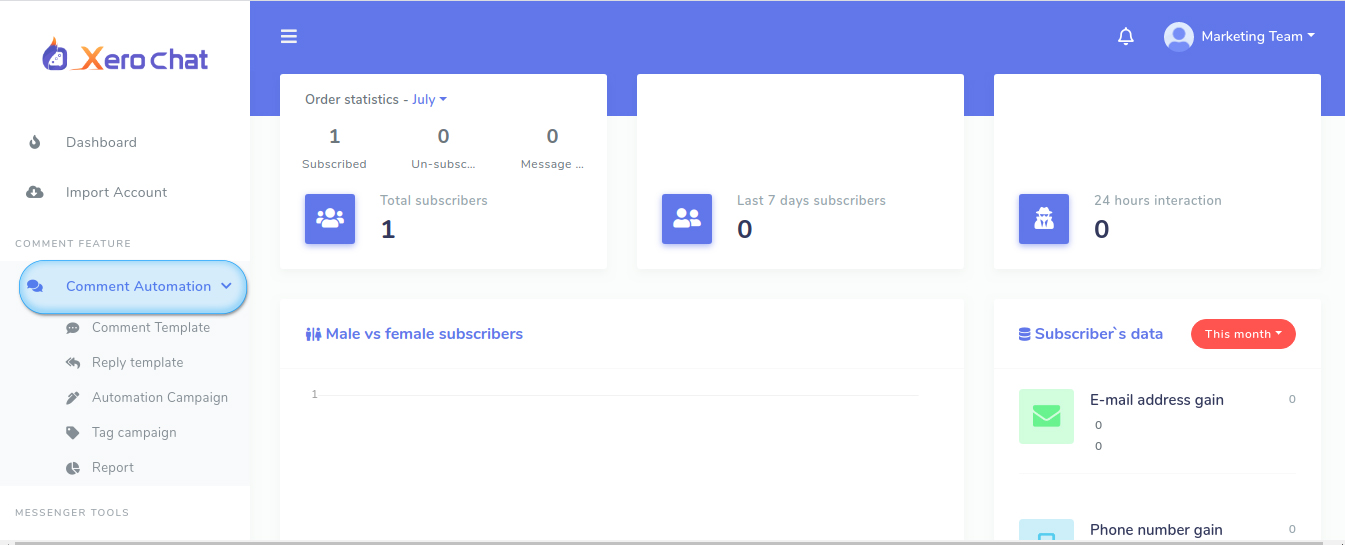
You will see the ‘Comment automation’ feature. Click on the ‘Comment automation’, and a drop-down submenu of ‘Comment template’, ‘Reply template’, ‘Automation campaign’, ‘Tag campaign’, and ‘Report’ will appear.
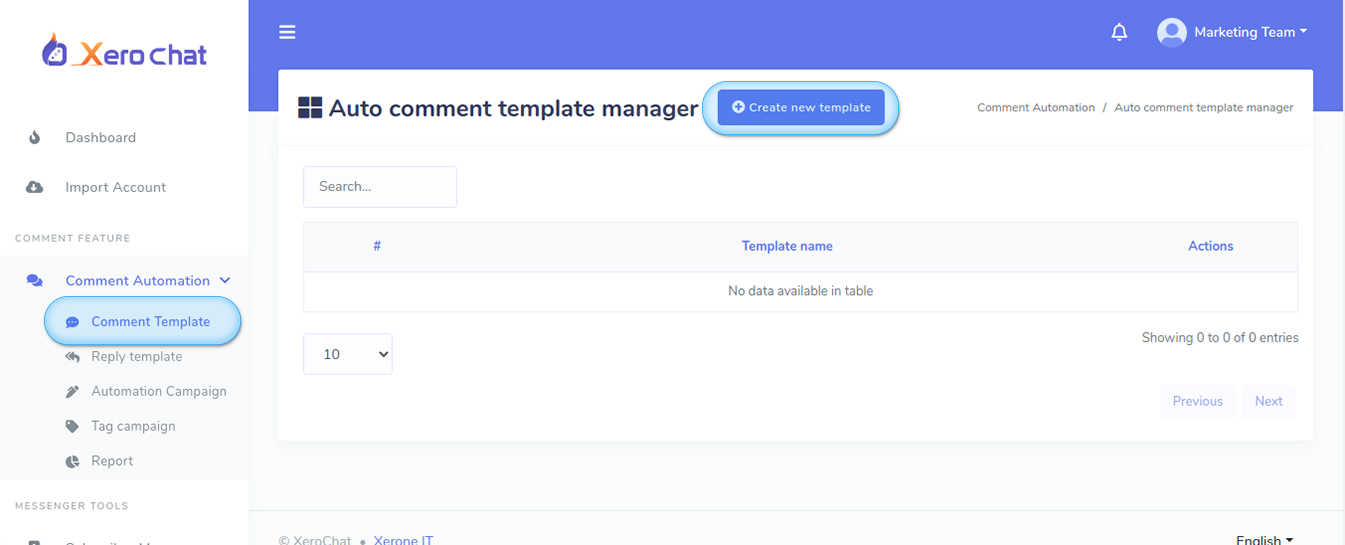
Click on the ‘Comment template’ and a page called ‘Auto comment template manager’ will appear. Now click on the ‘Create new template’ button at the top of the page, and a modal form will appear— you have to fill the form.
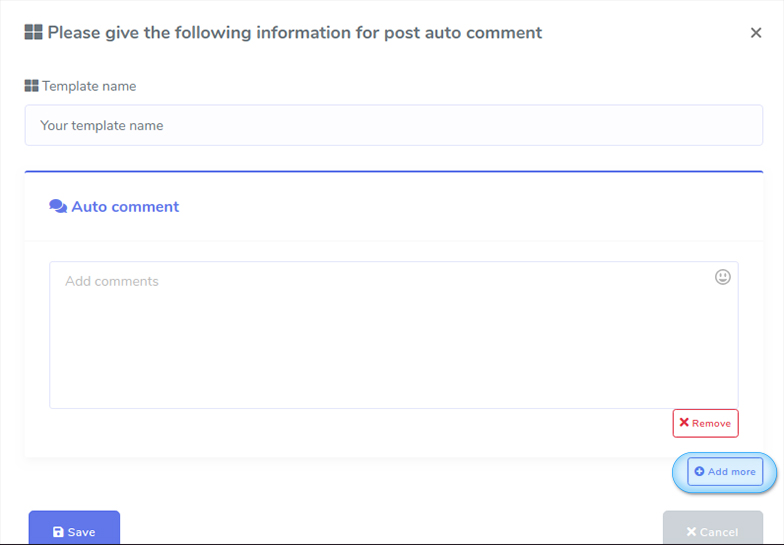
Write a ‘Template name’ in the ‘Template name’ box. Then write a comment in the ‘Auto comment’ box, the comment that will be made automatically under your Facebook pages’ posts. You can add as many comments as you want by clicking on the ‘Add more’ button. Then click on the ‘Save’ button.
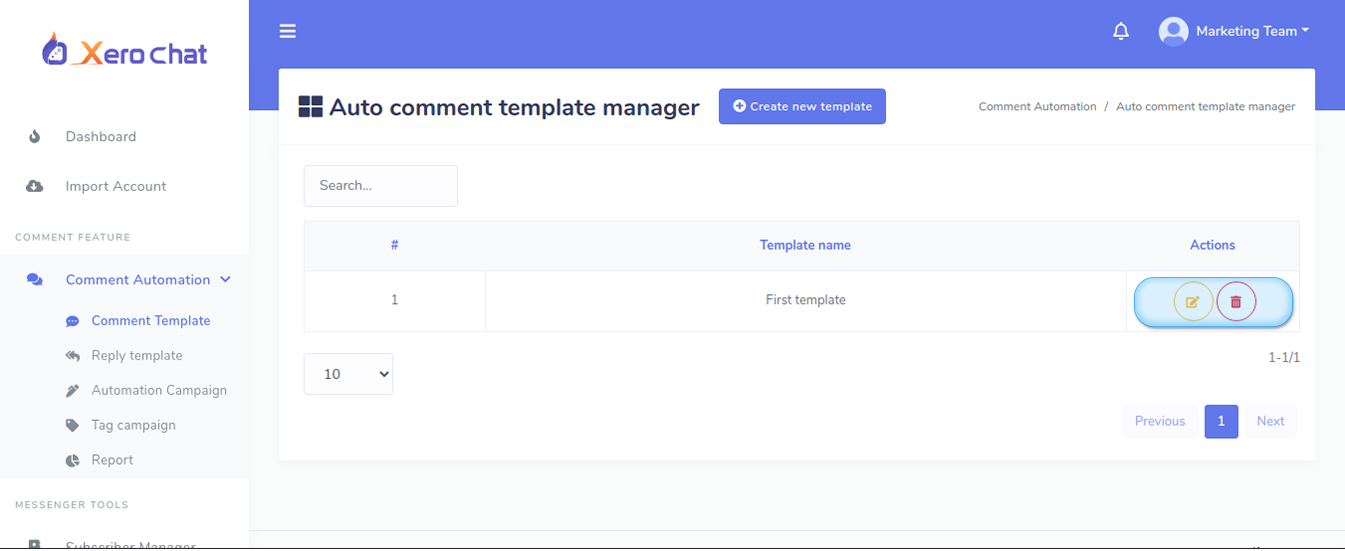
Now the template is created and you can see the template name on the page called ‘Auto comment template manager’. Beside the template name, you will see the ‘edit’ and ‘delete’ icon. By clicking on the ‘Edit’ icon, you can edit the campaign. And by clicking on the ‘Delete’ icon, you can delete the template. Of course, you can create another template by clicking on the ‘Create new template’ button— you can create as many templates as you want.
After you have created one or more ‘Auto comment template’, click on the ‘Automation campaign’ menu under the ‘Comment automation’ feature.
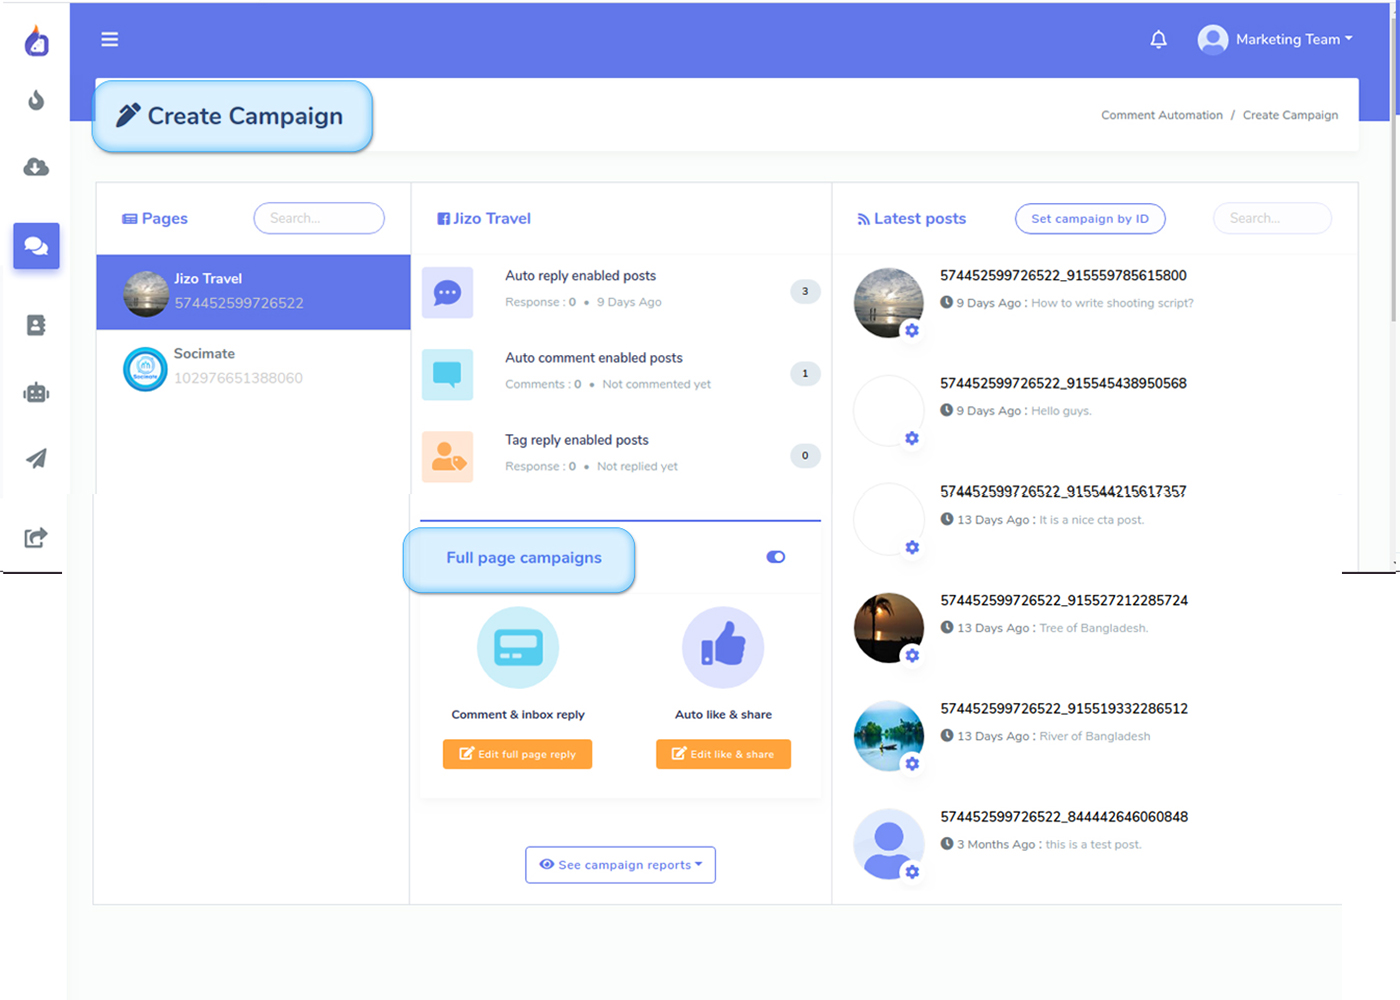
Right away, a page called ‘Create campaign’ will appear. On the left side of the page, you will see the list of your Facebook pages. Select a page which you want to create a campaign for. At the middle of the page, you will see your Facebook page that you have selected and under the page the numbers of ‘Auto reply enable posts’, ‘Auto comment enable posts’ and ‘Tag reply enable posts’. That is, you can see how many posts you have already enabled for auto reply, auto comment, and tag reply.
At the bottom, you will see the Full page campaign with two options— ‘Comment and Inbox reply’ and ‘Auto like and share’.
If you want to enable replies for a full page, click on the ‘Enable full page reply’ button. Instantly, a modal form will appear.
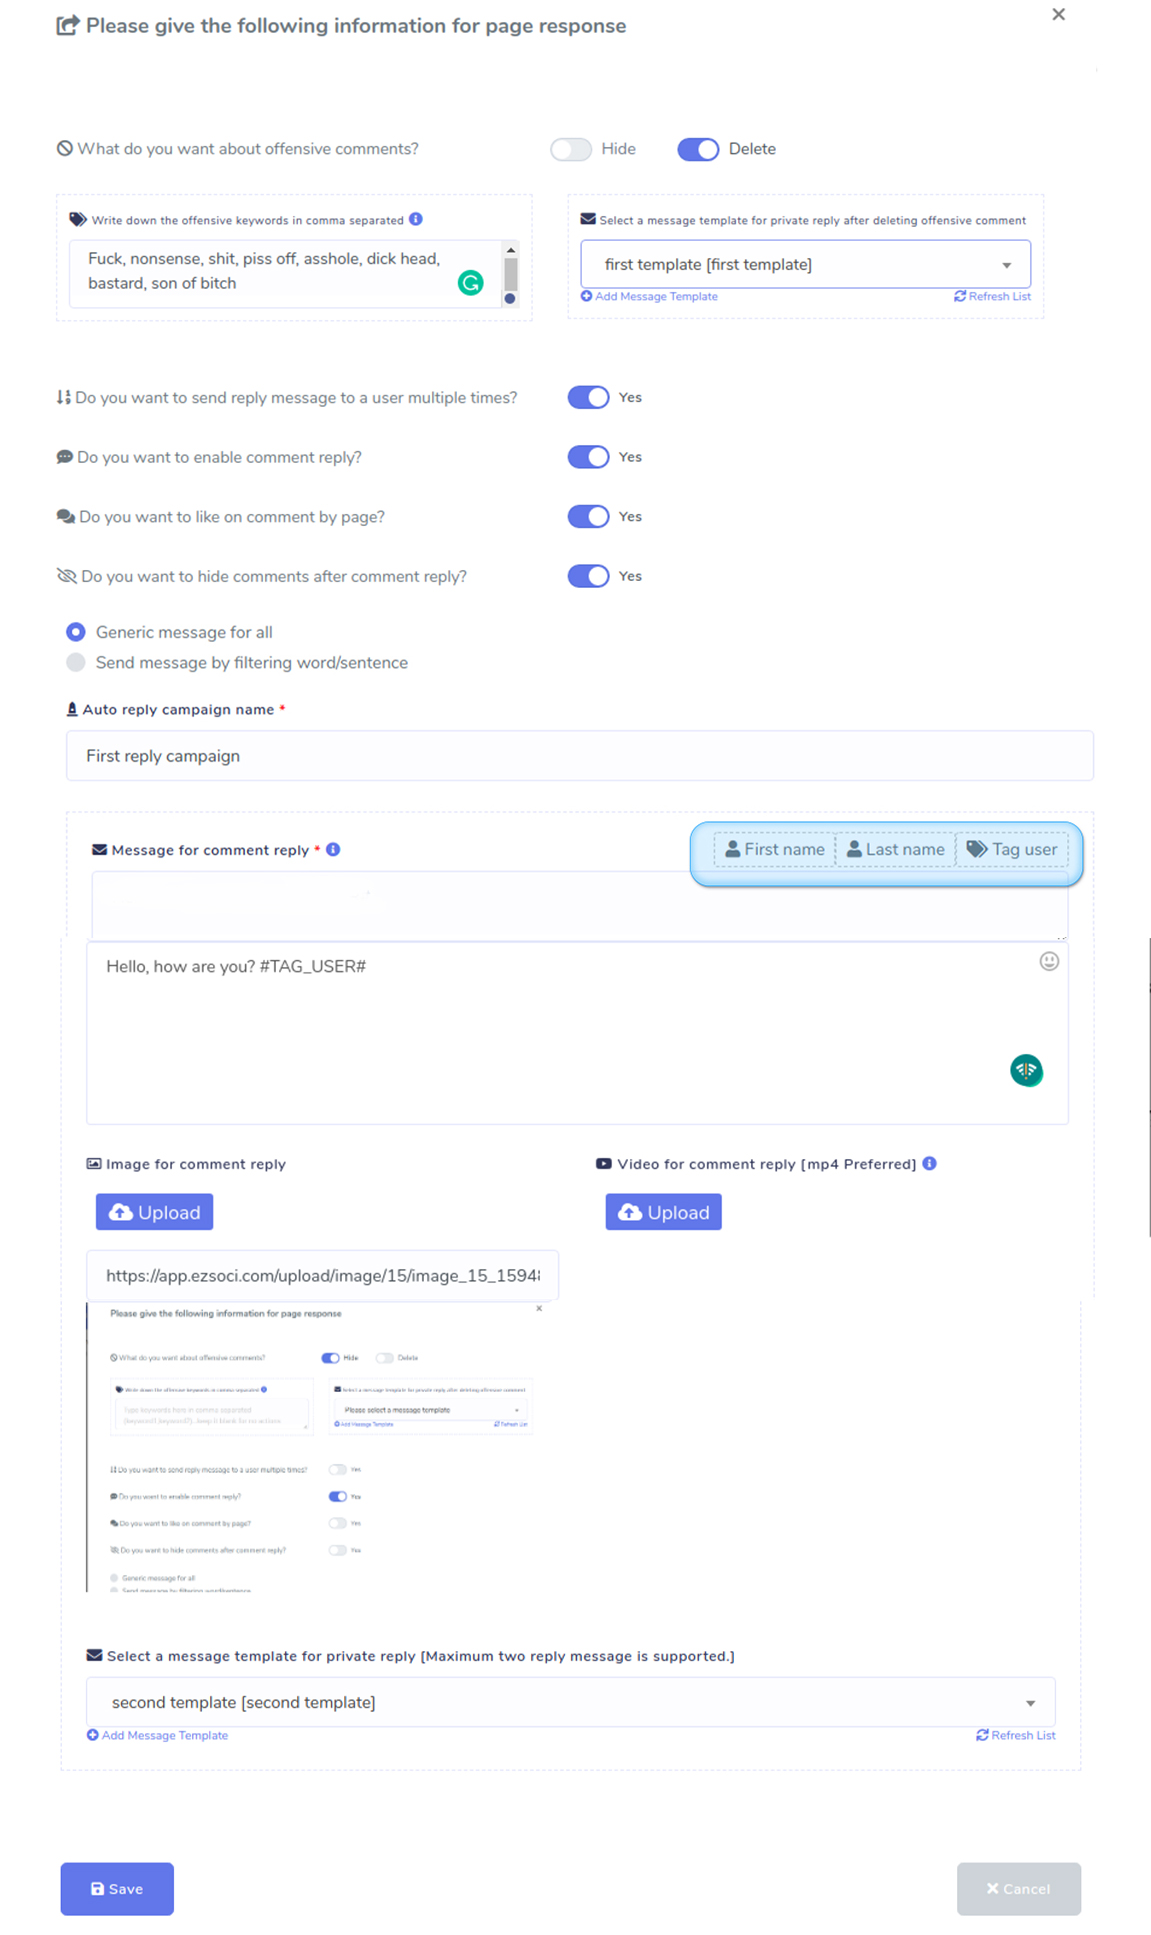
You can hide or delete offensive comments by selecting ‘Hide’ or ‘Delete’ and writing the keywords you consider as offensive in comma separated in the box. Then you have to select a message template for private reply after deleting offensive comments. If you haven’t already created a message template, you have to create a message template first by clicking ‘Add message template’ button. Just as you click on the ‘Add message template’ button, another modal form will appear.
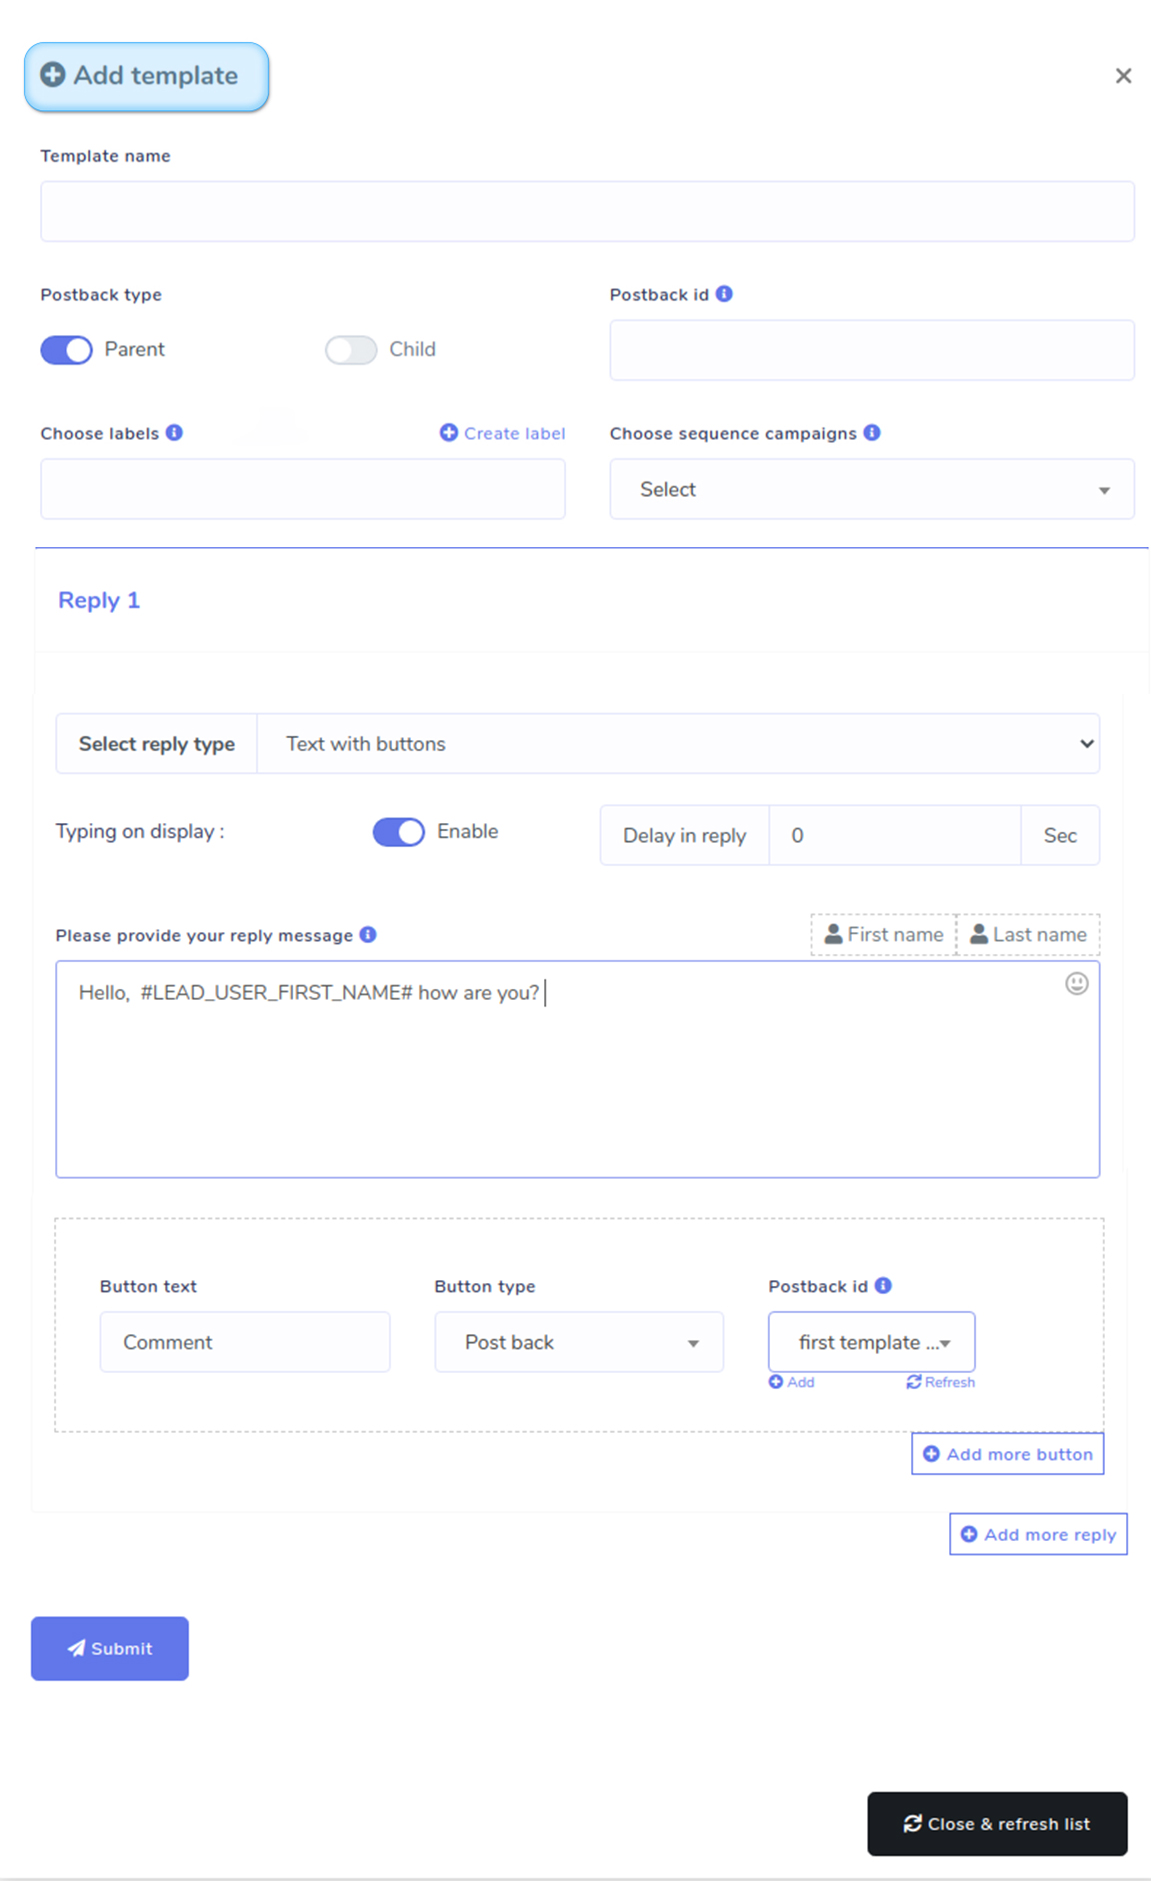
Now you have to fill the form to create a message template. Now write the template name in the ‘Template name’ box. Now select ‘Parent’ postback type and write a ‘postback id’ name in the ‘Postback id’ box. Then from the ‘Choose level’ box, you can choose levels. But if you haven’t already created levels, you can create one by clicking on the button called ‘Create level’. Just as you click on the ‘Create level’, a pop-up box will appear. Write the level name and click on the ‘New Level’ button. Of course, you can create as many levels as you want. Then select the levels for the message template. It is optional— you can keep it blank. Then from the ‘Choose sequence campaign’ box, you can choose sequence campaign. It is also optional— you can also keep it blank.
Then you will see the second part— Reply. First you have to select ‘Reply type’. You can select any from Text, Image, Audio, Video, file, quick reply, text with buttons, Generic template, carousel, media and one time notification. Then you can enable typing on display and set the time on delay in reply.
If you select reply type as text, you have write only a text in the message box. Above the box, there are two icons ‘First name’ and ‘Last name’. By clicking on them, you can include ‘First name’ or ‘Second name’, when the message will be sent to the people. You can add more reply, by clicking on the ‘Add more reply’ button. If you select reply type as image, you have to upload an image. Likewise, if you select a video or file, you have to upload a video or a file. If you select a quick reply, you have to write your reply in message box, then you have to write the button text in the ‘button text’ box. Then you have to select a button type form— postback, user’s phone no, user’s birth date. If you select postback, a box called ‘Postback id’ will appear. You have to select a postback id from the box. If you haven’t already created a postback id, you have to create one by clicking on the ‘add’ button under the box. Just as you click ‘add’ button, a pop-up form called ‘Add template’ will appear.
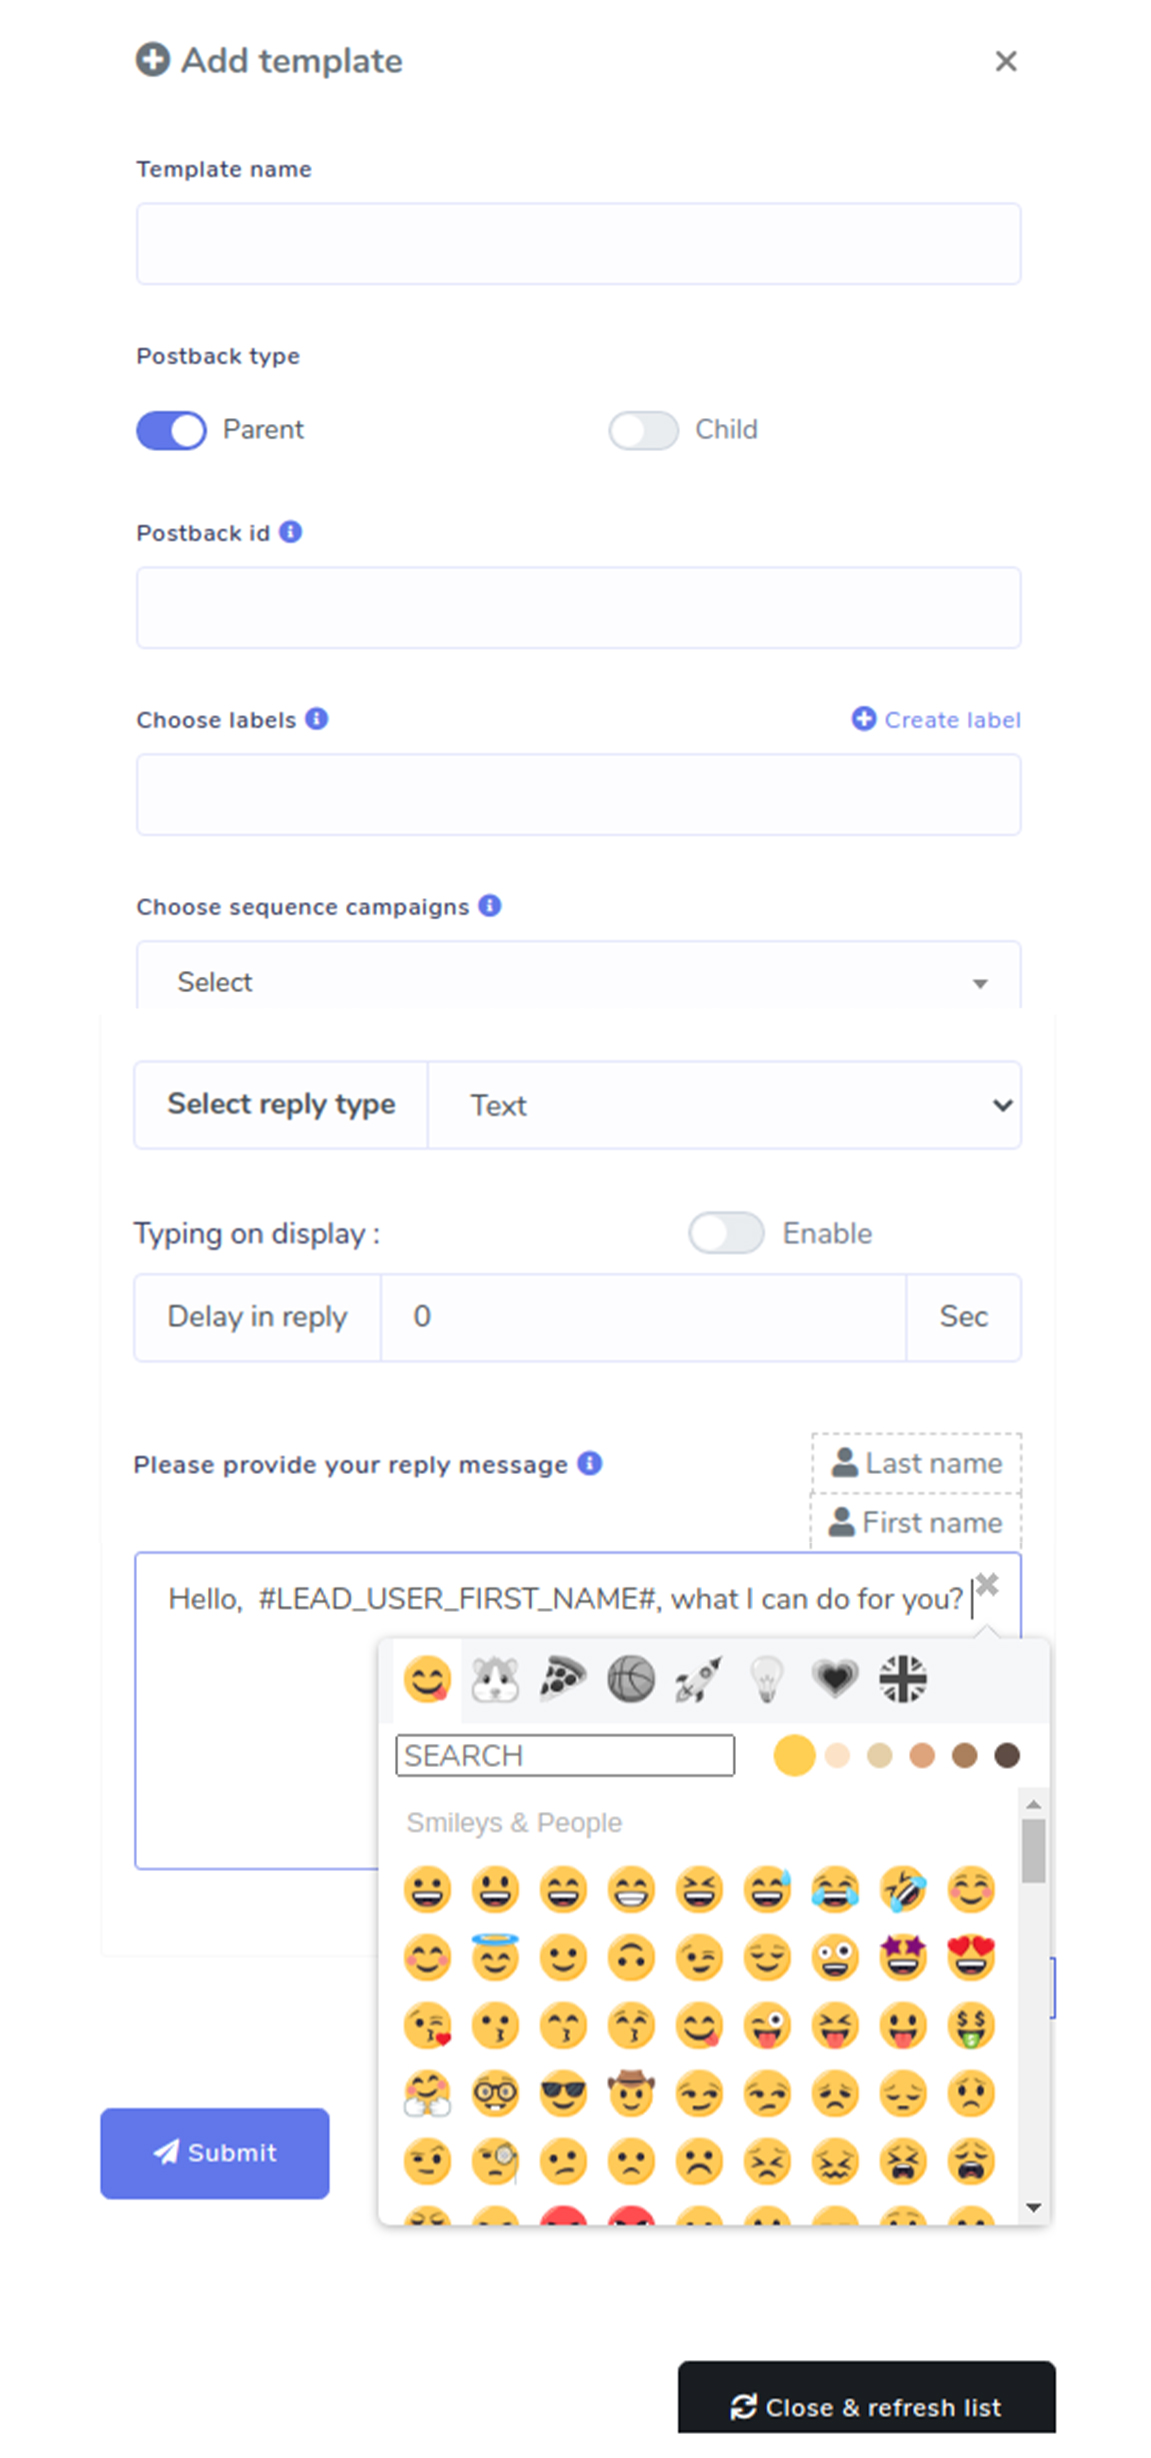
It is the same as creating a message template. Write a template name in the ‘template name’ box. The template name will appear in the postback id box— template name will work as postback id. Now you can select level from choose level box— it is optional, you can keep it blank. Now you can choose sequence message from the box— it is also optional, you can keep it blank. Then select a reply type. Here I select text. If you select text with button and select postback button in the button type, you have to create another postback button. Well, write a text in the message box— in the message box, there is a emoji option. Clicking on the emoji, you can insert emoji in the message. Now click on the submit button and you will see a pop-up message— your template has created successfully. Now click ok and then click on ‘Close and refresh button’.
Now you will come back to the first modal and see a message template is selected. Then select or unselect some options as your wish. Then write an auto reply campaign name in the box. Then write a message for a comment reply— in this comment you can mention them as their first name or last name or tag user. You can also upload an image or a video for comment reply. Then select a message template for private reply. Then click on the save button. If all the information is provided, you will get a success message.
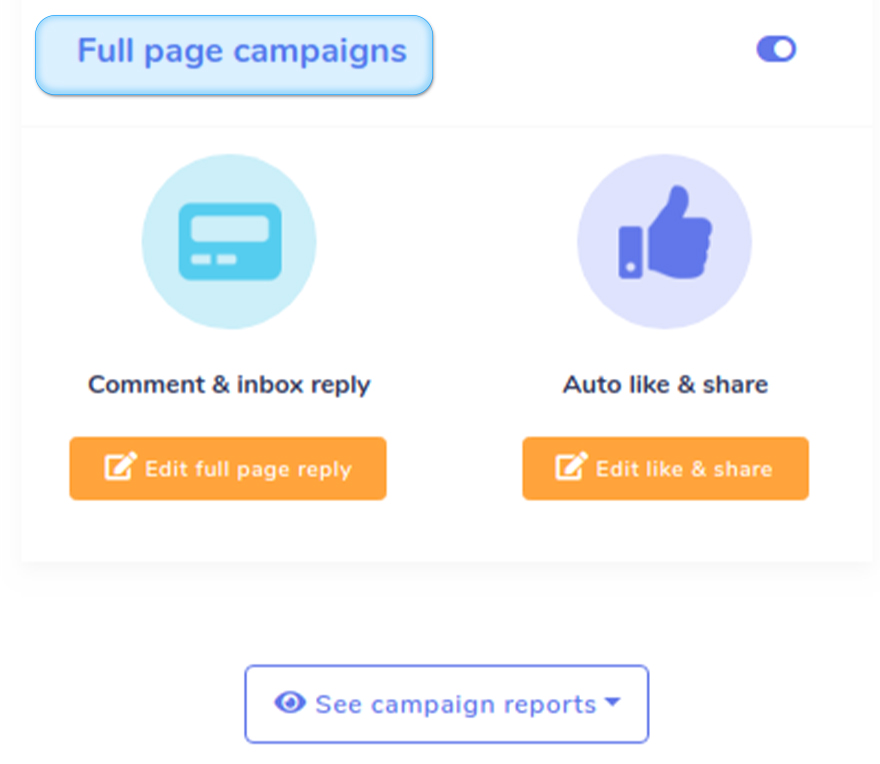
Then come the auto like and share option. If you want the option to work, click on the button called ‘Edit like and share’. Just as you click, a pop-up form will appear.
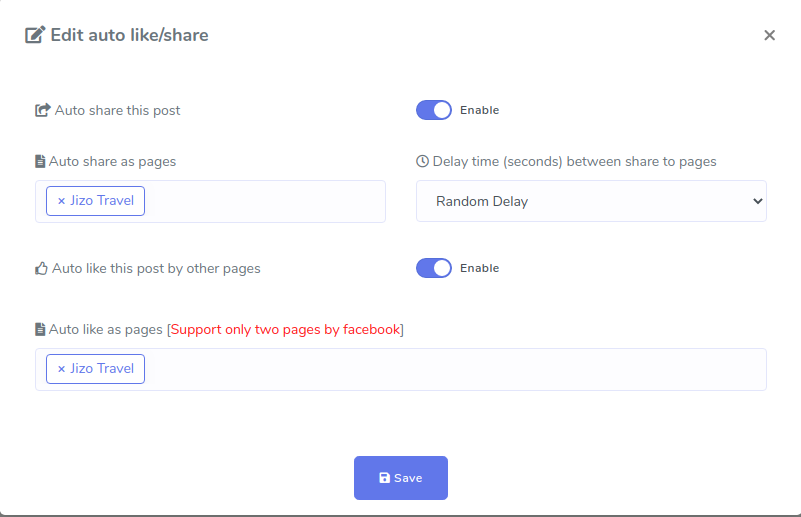
Enable ‘Auto share this post’ and then select a page or pages in the box called ‘Auto share as pages’. Then select Delay time in seconds between share to pages. Then enable ‘Auto like this post by other pages’ and a box called ‘Auto like as pages’ will appear. Select a page or pages you want to auto like as pages. Then click on the save button. Now you will get a success message.

Then click on the ‘See campaign report buttons’ to see the report of ‘Comment Automation’ feature’s different parts. Just as you click on the button, a drop-up menu with ‘Auto reply report’, ‘Auto comment report, commenting report, Full page reply report, Auto like and share report’. Click any of them to see their respective report.
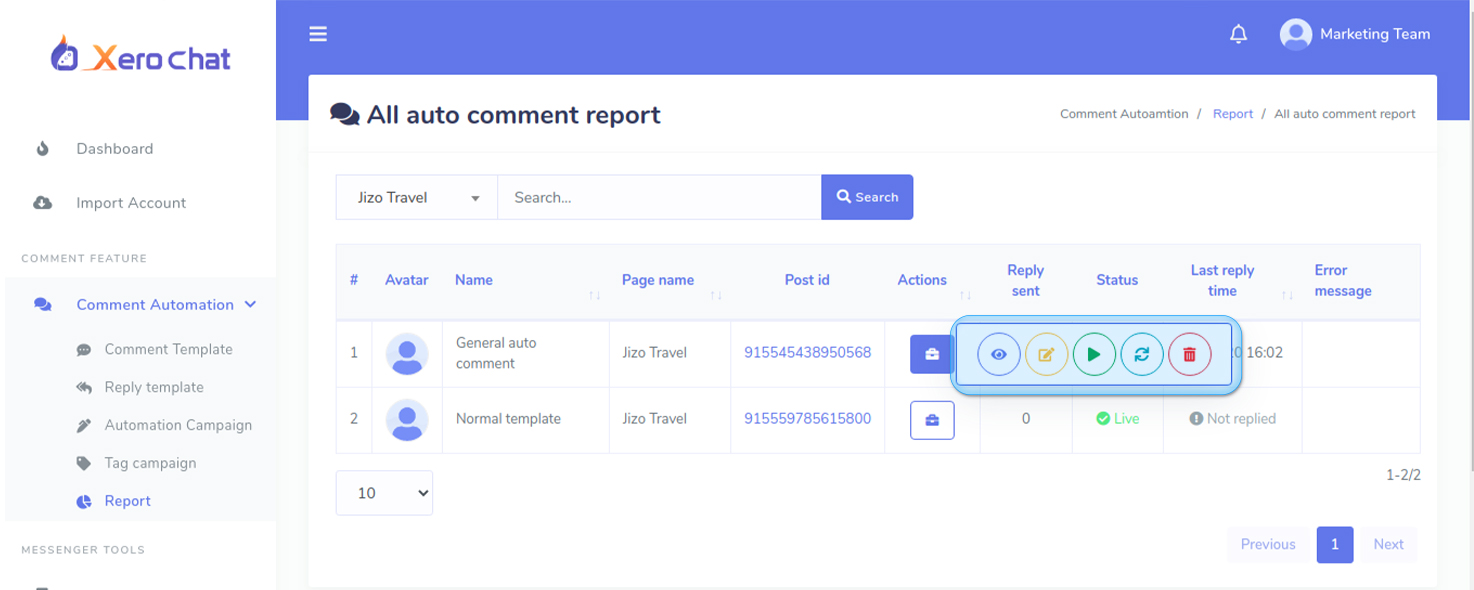
From the reports, you can see the status— live or expired— of specific campaign. Each campaign has an action button. Click on the action button and a horizontal drop-down menu with some icons. By clicking on the icons, you can do some actions.
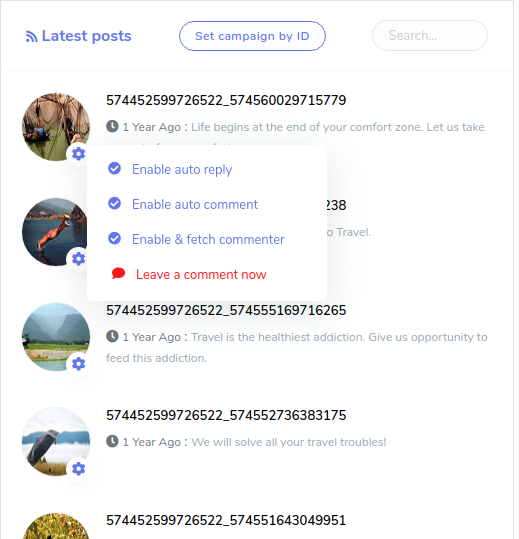
At the right panel of the ‘Create campaign’ page, you will see the latest posts of your page you selected. To enable ‘Comment Automation’ for any single post, click on the ‘gear’ button of the specific post. Right away, a drop-down menu will appear that includes ‘Enable auto reply’, ‘Enable auto comment, ‘Enable and fetch auto commenter’, and ‘leave a comment now’. To enable auto reply for the specific post, click on the ‘Enable auto reply’ menu and a modal form will appear.
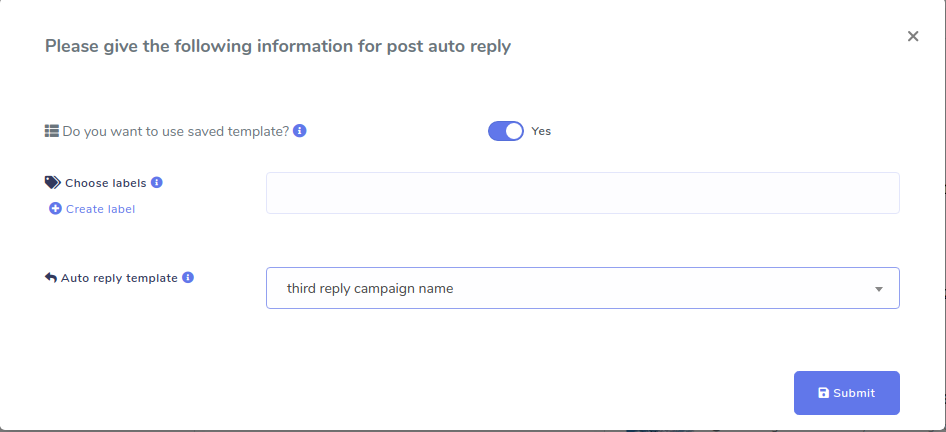
If you want to use saved template, keep ‘Yes’ on the radio button. Then ‘Choose level’ from ‘Choose leve’ box— it is optional, you can keep it blank. Then you have to select ‘Auto reply template’ from the ‘Auto reply template’ box. If you already created ‘Auto reply template’, you can select. But if you haven’t created any, you have to create Auto reply template first. You can create auto reply template from here or from ‘Reply template’. To create auto reply template from here, unselect ‘Yes’. Instantly, a form will appear that you have to fill-up— I have already showed how to fill-up the form. If you want to save the template for later use click on the ‘Submit and save as template’ button. Contrary, if you want to only submit the template without saving it, click on the ‘Submit’ button.

Then click on the ‘Enable auto comment menu’ and pop-up form will appear. Write the auto campaign name in the box. Then you have to select the auto-comment template from the box. If you already haven’t created auto comment template before, you have to create it first. To create ‘Auto comment template’ click on the ‘Comment template’ of ‘Comment Automation’ feature. Instantly, ‘Auto comment template manager’ will appear. I have already shown how to create a comment template before in this article.
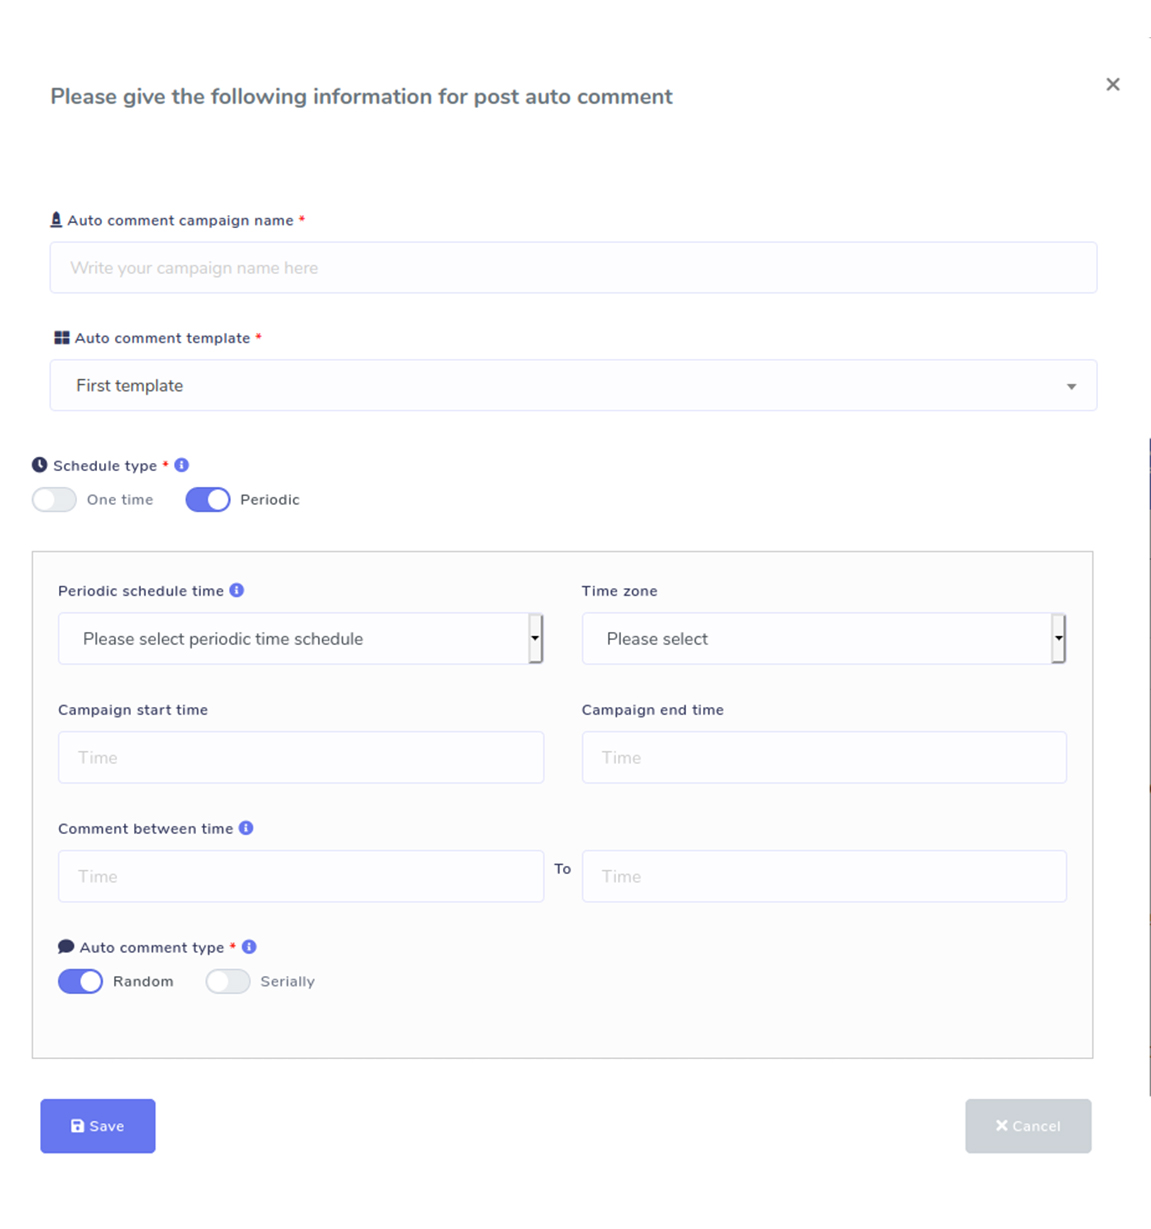
Now click on the ‘Auto comment template’ box and you will see the template you just created. Now select the template. Then select schedule time ‘One time’ or ‘Periodic time’. If you select ‘One time’, click on the schedule time box and a calender will appear. From the calender select a date and time. Then select your time zone. Now click save button. If you select periodic, you have to provide some extra information.
You can enable tag by clicking on ‘Enable and fetch commenter’ option.
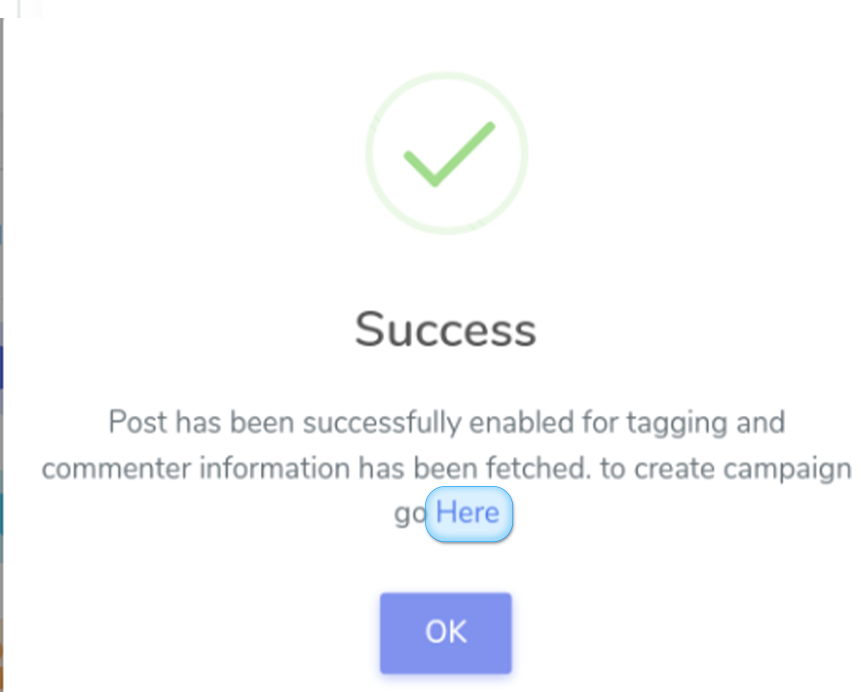
Just as you click, a success message will appear— ‘Post has been successfully enabled for tagging and commenter information has been fetched. To create a campaign go here.’ Click on the ‘Here’, a page will appear called create campaign.

And you will see the campaign. Form here you can see the report of the campaign.
Now click on the ‘Leave a comment now’, a pop-up form will appear.
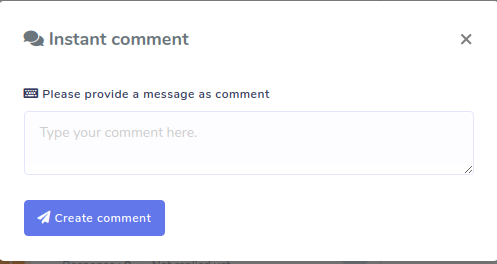
Now write a message that will be a comment. Now click on the create campaign button. Instantly a success button will appear and you can see the comment under the post.
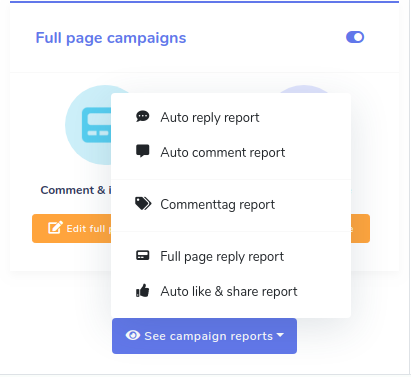
If you want to see the campaign reports, click on the button called ‘See campaign reports’, and a drop-up menu will appear. From the drop-down menu, you can see different reports of different things. For example, click on the ‘Auto reply report’ menu and a page will appear called ‘Auto reply-report’ will appear.
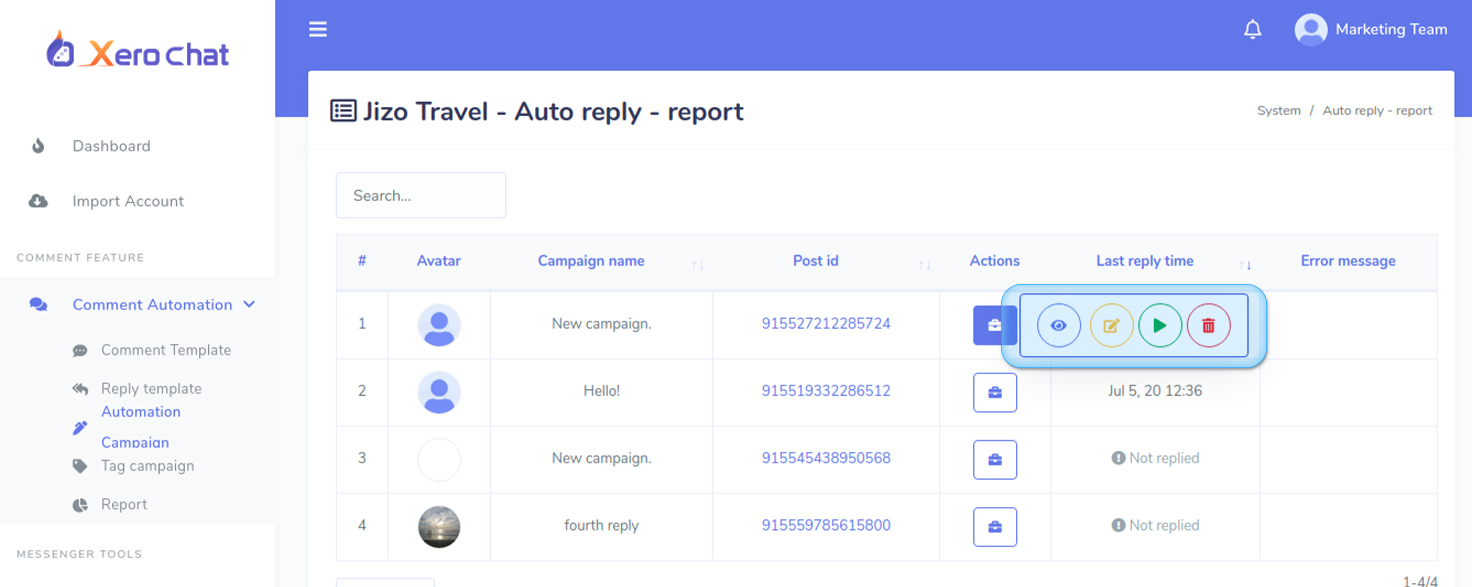
From here, you can see the reports of the campaign, edit the campaign, start or pause the campaign and delete the campaign. By clicking on the post id, you can go to the post on the page.