
How to use ChatPion’s special feature ‘Social Poster’?
ChatPion, the world’s best marketing-related software, has many features- most of the features do the marketing of your products and one feature called ‘E-commerce in messenger chatbot’ sells your products to clients directly. One of the features that do the marketing of products is “social Poster”.
ChatPion’s ‘Social Poster’ can post on Social media spontaneously.
The feature called ‘Social Poster’ is divided into two parts, ‘Facebook Poster’ and ‘Comboposter’— ‘Facebook Poster’ can make posts on only Facebook pages whereas ‘Comboposter’ can make posts on different social media including Facebook page. If you only use Facebook pages to do the marketing of your business, you might as well use the ‘Facebook poster’. On the other hand, if you use different social media to do the marketing of your business, you should use ‘Comboposter’.
‘Facebook Poster’ can make multimedia posts, CTA posts and carousel/ video posts. The multimedia post can post Text, image, link and video on Facebook pages regularly. The CTA post can create CTA posts— call to action post— on Facebook pages. The carousel/video post can make carousel and video slideshow posts.
‘Comboposter’ can make Text post, image post, video post, link post, Html post and Auto post on different social media such as Facebook, Twitter, Pinterest, LinkedIn, WordPress, Blogger, and WordPress (self hosted).
How to use ChatPion’s ‘Social Poster’:
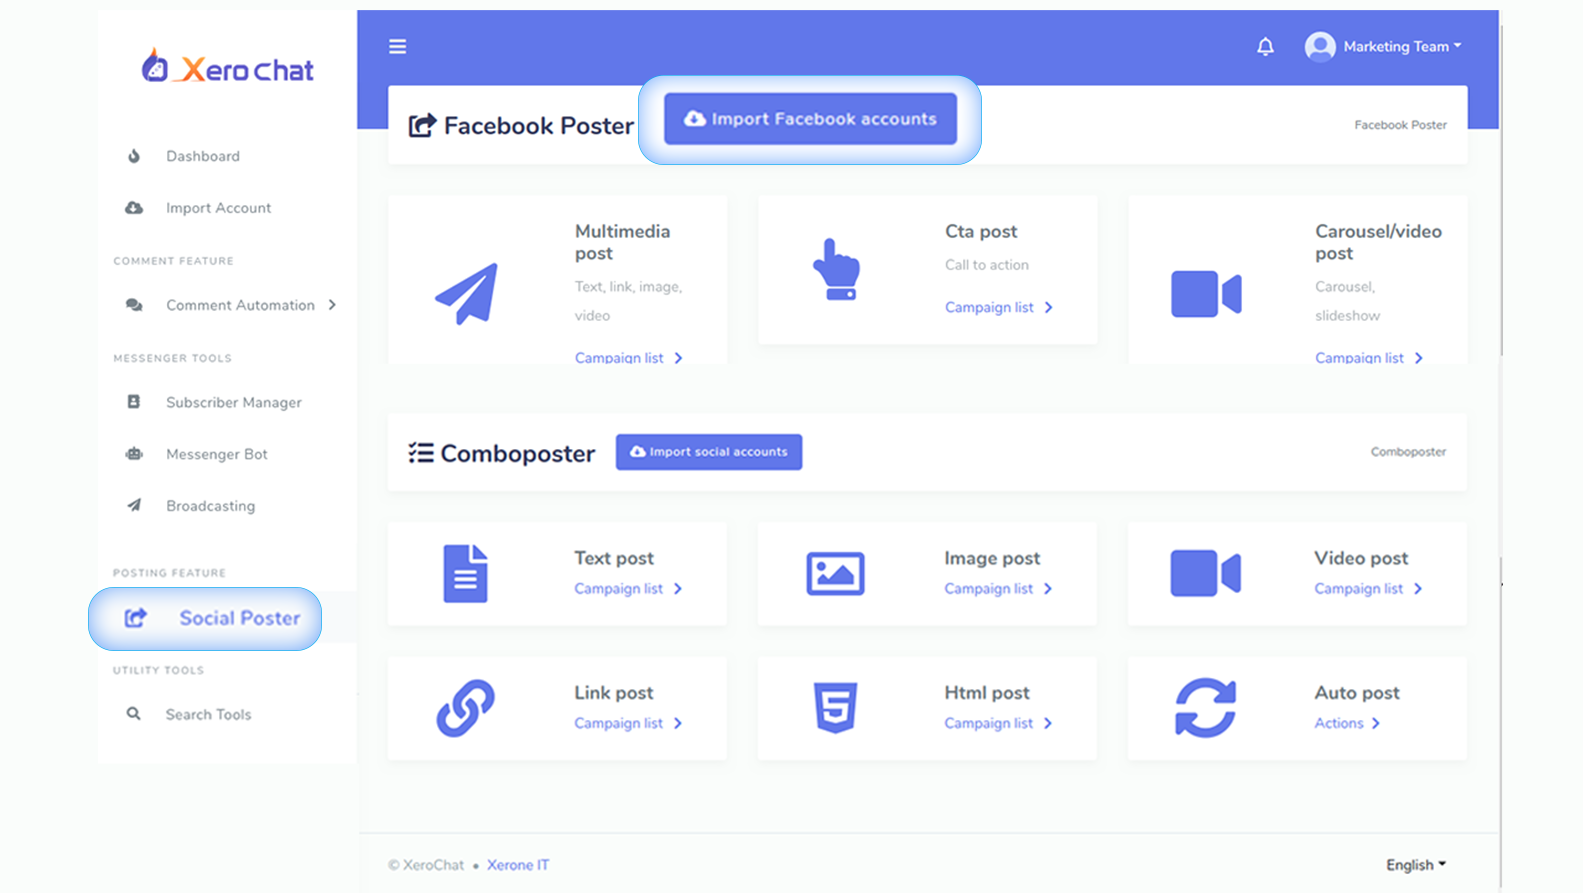
At the left panel of ChatPion’s dashboard, you will see a menu called ‘Social Poster’. Click on ‘Social Poster’ and instantly a page will appear that is divided into two parts— ‘Facebook Poster’ and ‘Comboposter’.
Facebook poster:
To use ‘Facebook Poster’, first, you have to import a Facebook account that has at least one page. To import your Facebook accounts, click on the ‘import Facebook accounts’ button.
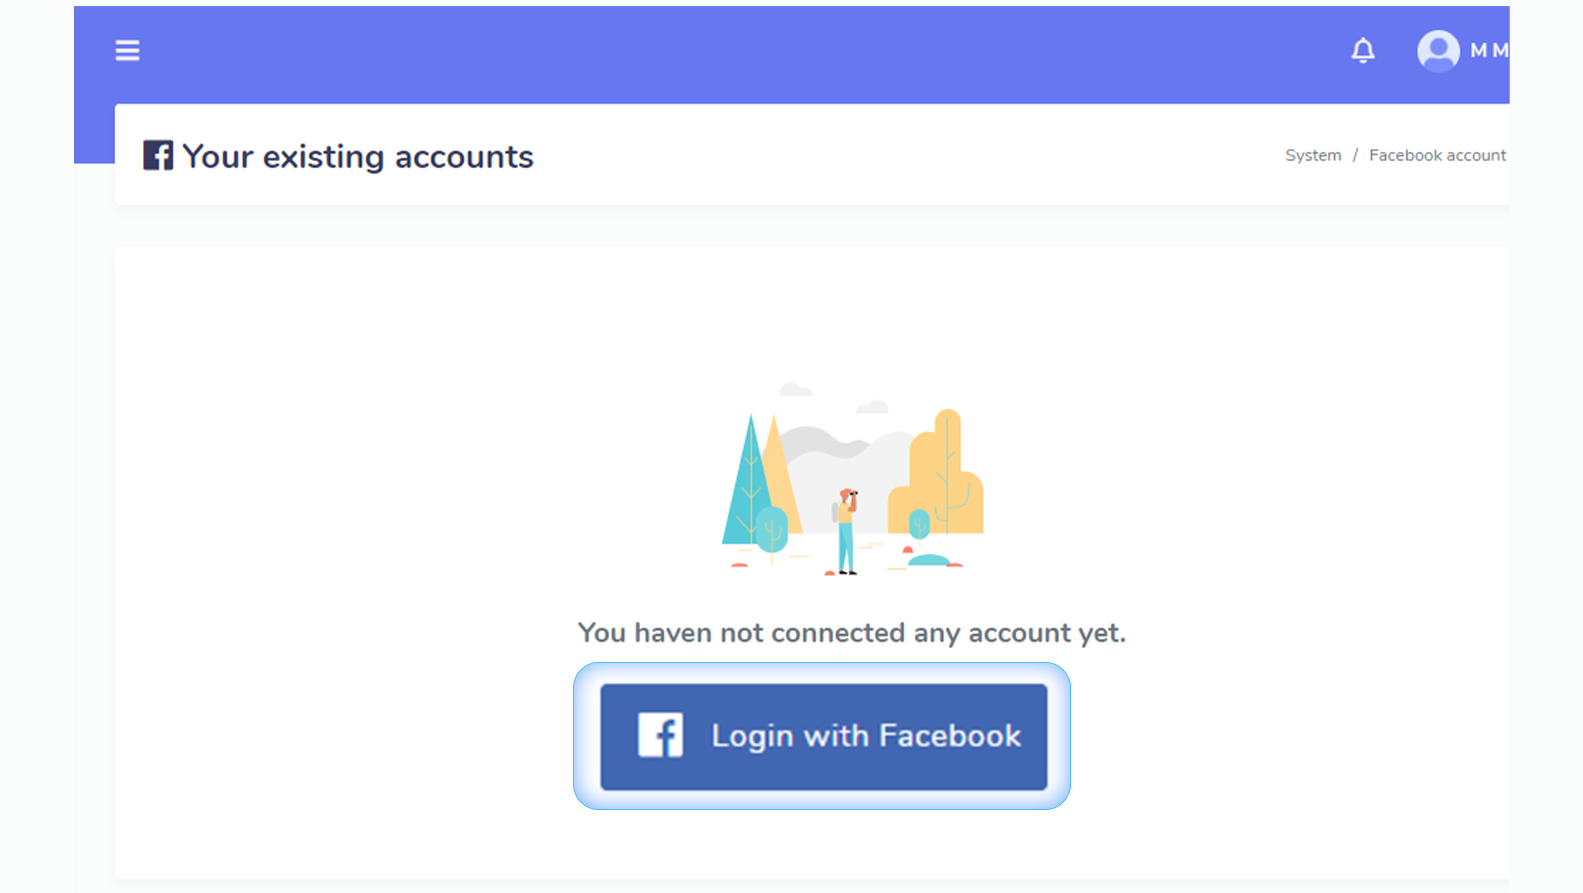
Just as you click, a page called ‘your existing account’ will appear. From the page, you can import your one and more Facebook accounts. To import an account, click on the ‘Log in with Facebook’. To import a Facebook account, you must be logged in your Facebook account that you want to import.
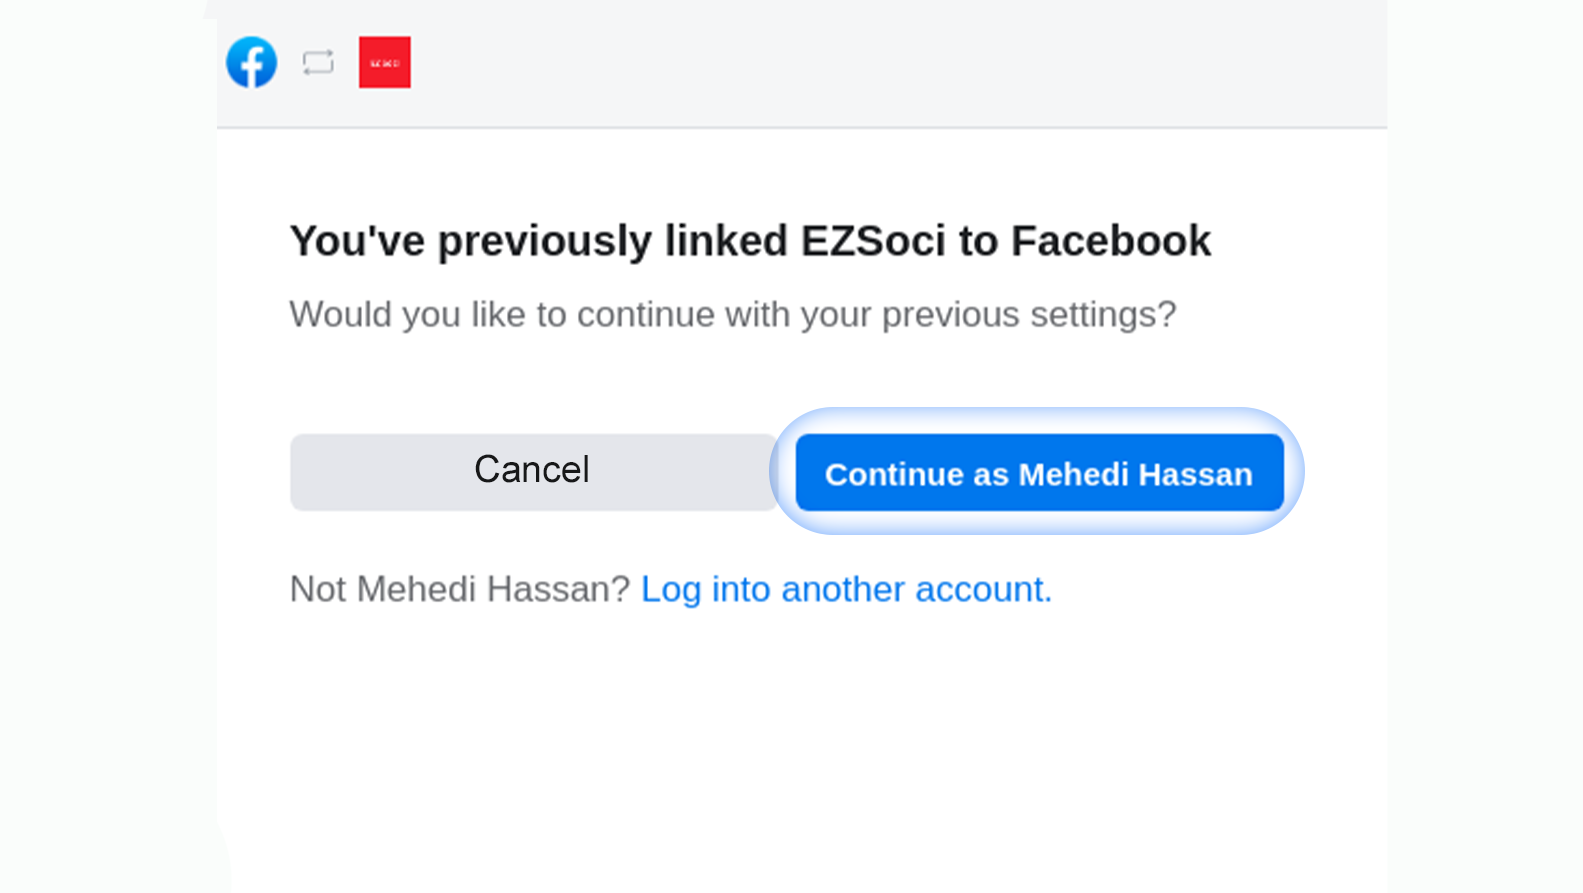
Just as you click on the ‘Log in with Facebook’ button, a page will appear with two buttons ‘Cancel’ and ‘Continue as your Facebook profile name’. Click on the ‘Continue as your Facebook profile name’ button and your Facebook account will be imported with all the pages.
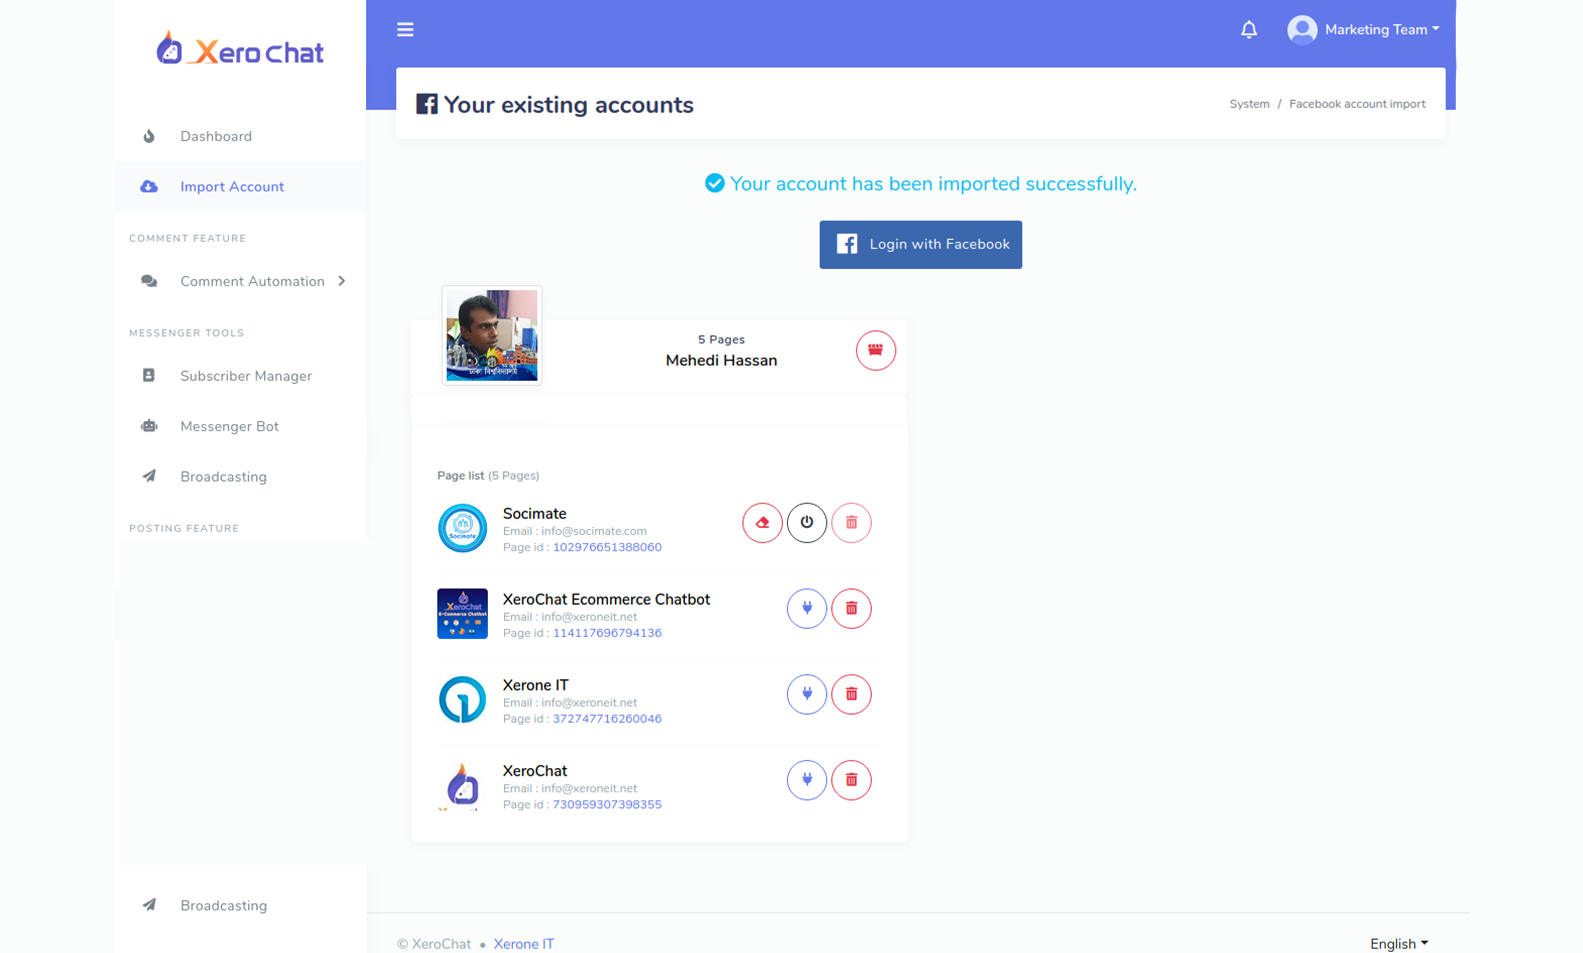
You will see all the pages in a list. You can delete any of the pages by clicking on the ‘Delete’ button placed beside the pages. To post on pages, first, you have to enable bot connection for your pages. To enable bot connection of any page, click on the ‘Enable bot connection’ button placed beside the page. Now your Facebook account is imported and bot connection is enabled for your pages. You can import many Facebook accounts and can enable bot connection for many pages. You can also remove your accounts or any page by clicking on the Delete or remove button placed beside the Facebook accounts or page.
Once you have imported your Facebook account and enabled bot connection for Facebook page, go back to the interface of ‘Social Poster’ by clicking on the ‘Social poster’ menu at the left panel of the Dashboard.
Just as you click on the ‘Social Poster’ menu, the interface will appear that is divided into two parts- ‘Facebook Poster’ and ‘Comboposter’.
If you want to create a multimedia post campaign, click on the ‘campaign list’ button under the ‘multimedia post’ menu in the ‘Facebook poster’ part.
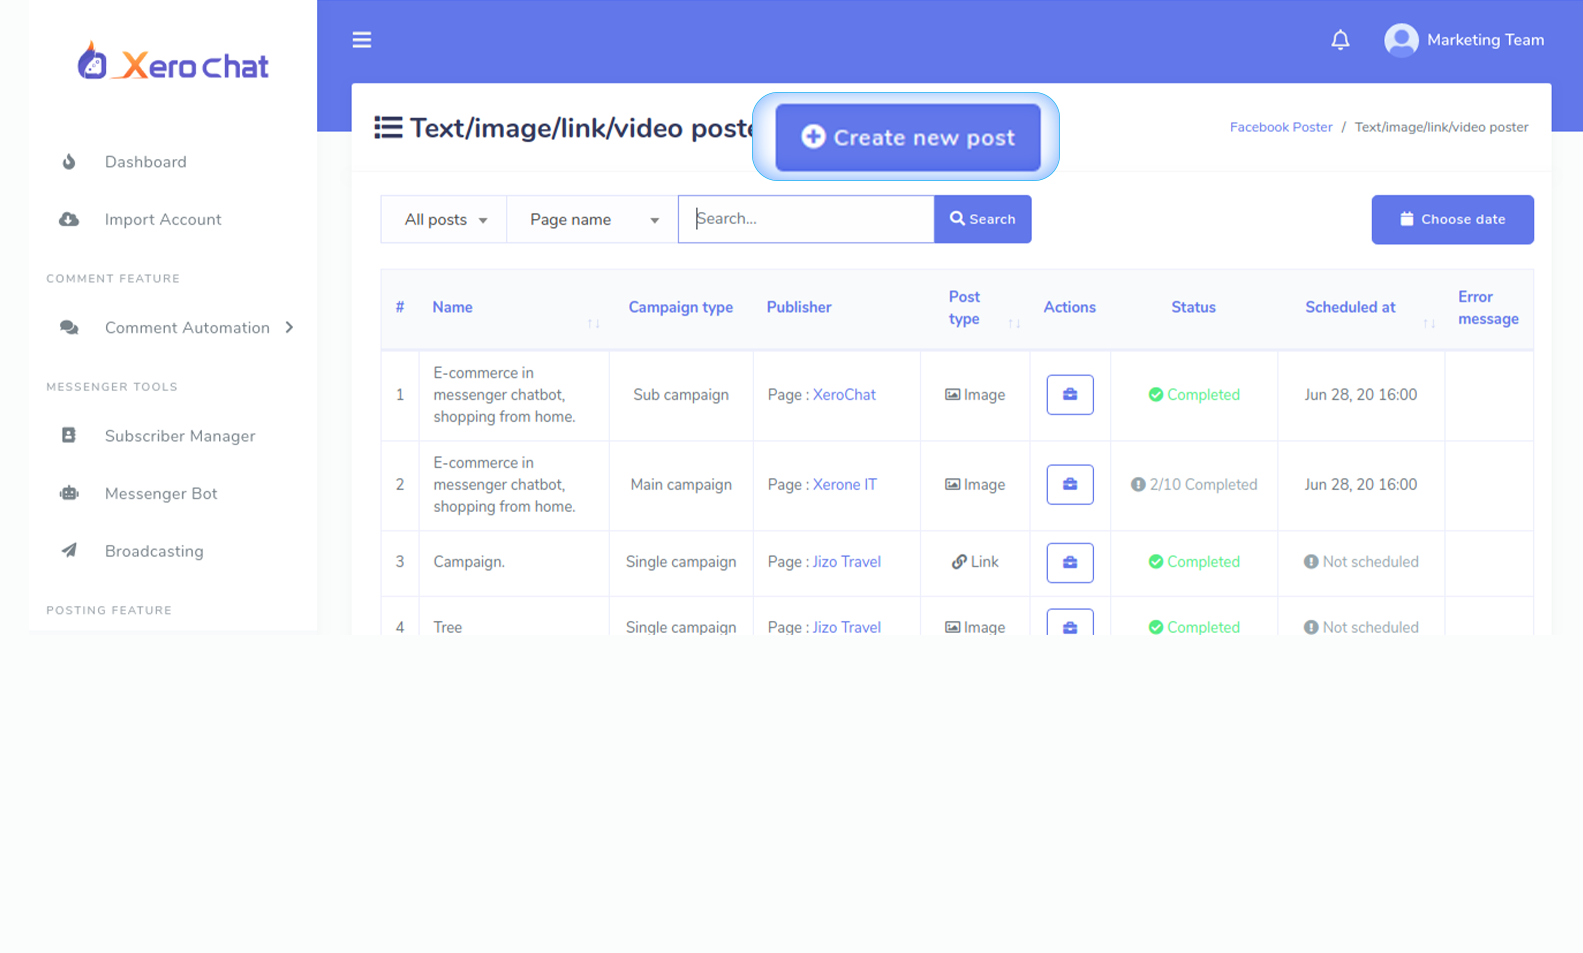
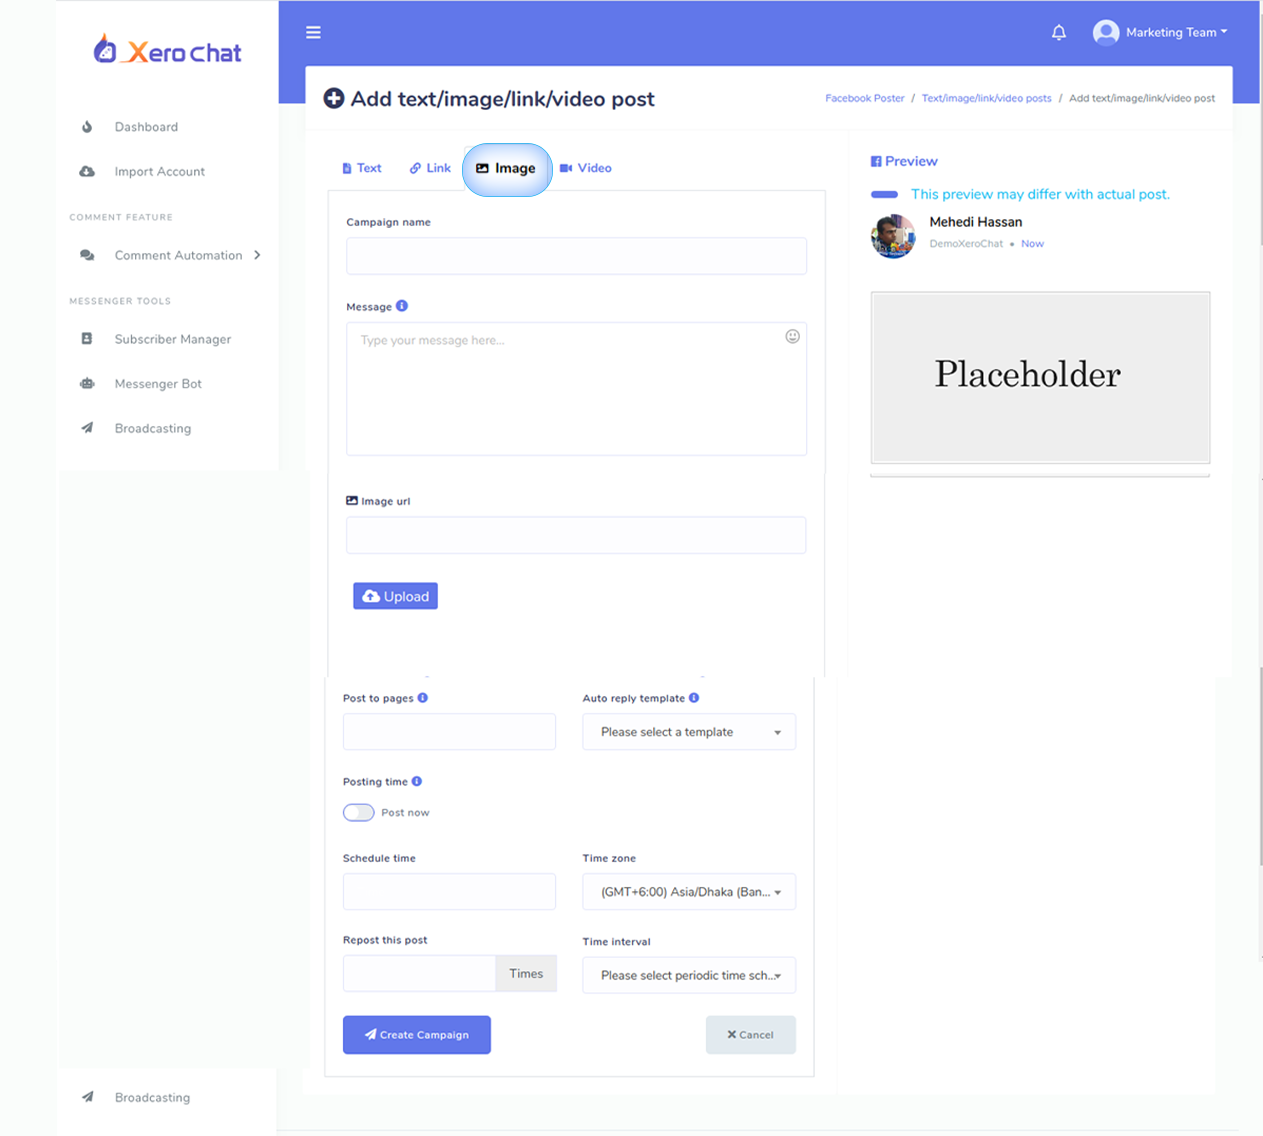
Instantly, a page will appear. At the top of the page, you will see a button called, ‘Create new post’. Click on the ‘Create new post’ button, and a form will appear that you have to fill to create the campaign. At the top of the form you will see four menus – Text, Link, Image and Video.
 Select ‘Image’ to make an image post. Then write a campaign name in the box called ‘Campaign name’. Then write a text in the box called message, the text that will go with the post— you can use spintext here. Now upload an image from your computer. Then you have to select at least one Facebook page on a box called “Post to pages”— you can, of course, select more pages from here. Beside the box, you will see a box called ‘Auto reply template’. I will not talk about the feature in this article, so I keep it blank. Under them, you will see a radio button called ‘Posting time’. If you keep the button ‘Post now’ selected, the media will be posted instantly and just one time. But if you want the media to be posted over and over again at intervals, you have to unselect the ‘post now’. Right away, four boxes will appear— ‘Schedule time’, ‘Timezone’, ‘Repost this post’ and ‘Time interval’. Just as you click on the ‘Schedule time’ box, a drop-down calendar will appear. From the calendar, you can set the date and time when you want to post. On the ‘Time Zone’ box, you can select your time zone. On the ‘Repost the post’ box, you have to write how many times you want the post to be re-posted. Then on the ‘Time interval box’, you have to select an amount of time from ‘every one hour’ to ‘every six months’. For instance, if you select every one hour, the feature ‘Social poster’ will post the image on your Facebook page every one hour. Well, now click on the “Create campaign” button and you are done. From now the ChatPion’s ‘Social poster’ feature will start his work without your supervision.
 If you select ‘Link’ from the menu, you have to provide the link on the box called ‘Past Link’. Likewise, if you select the ‘Video’ option, you have to upload a video. If you select ‘Text’, the text on the message box will be posted.
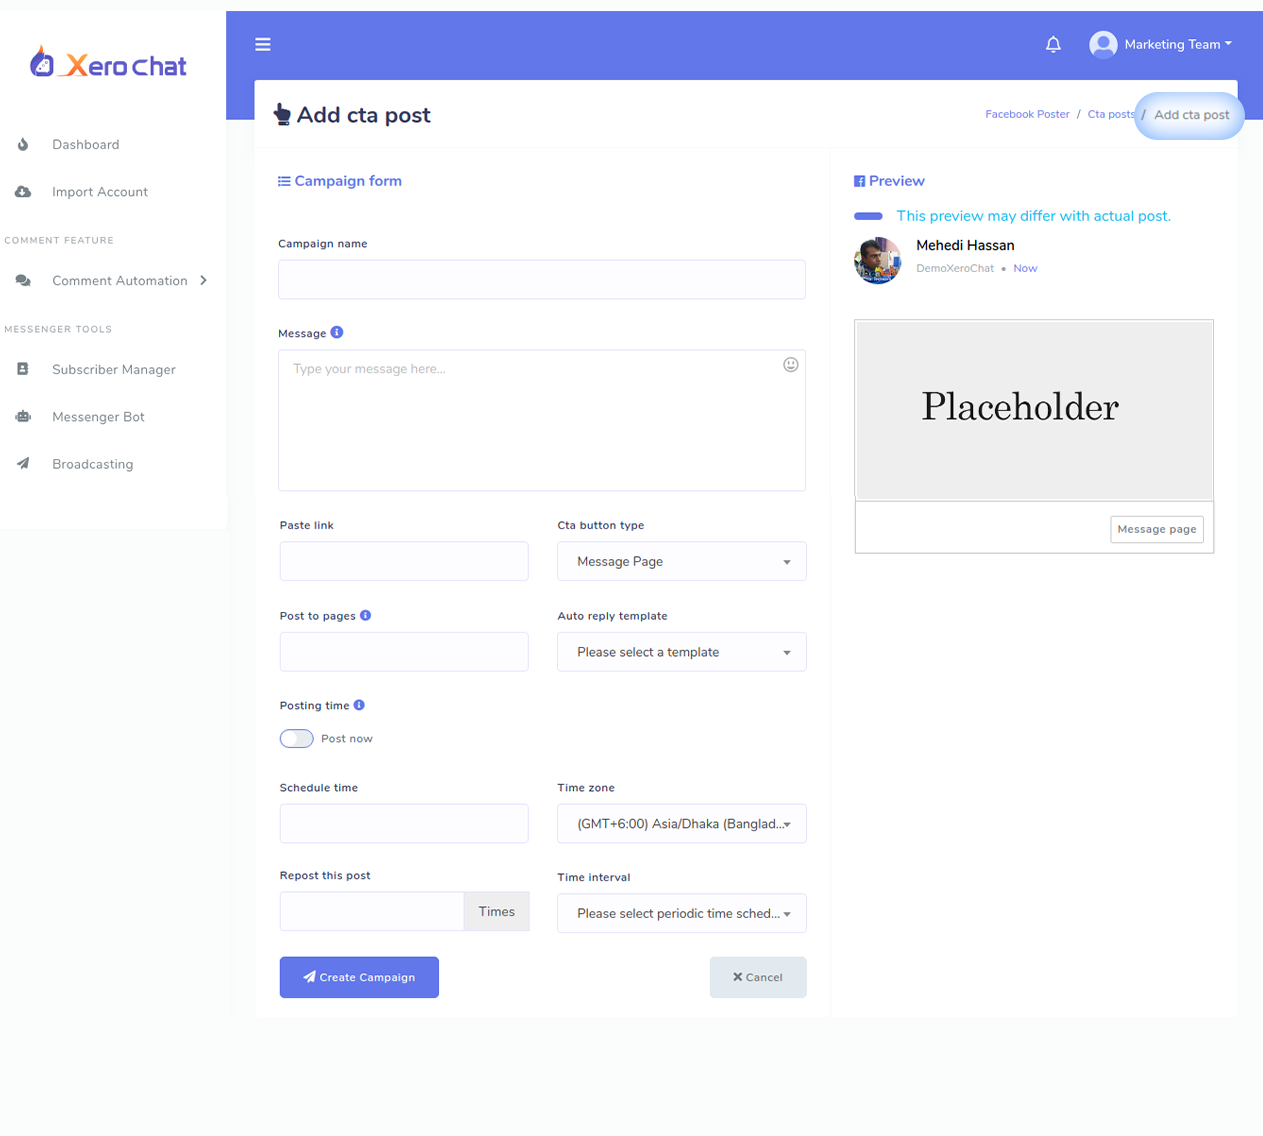
If you want to make CTA post on Facebook pages, click on the button ‘Campaign list’ under ‘Cta post’. Instantly, a page will appear called ‘Cta(call to action) poster’. To make a CTA post, click on the ‘Create new post’ button. Instantly, a form will appear called ‘Add Cta post’. Now write the campaign name on the ‘Campaign name’ box. Then write a text on the box called ‘Message’ that will go with the post. Then paste a link on the ‘Paste a link’ box, the link that will be posted as a Cta post on the Facebook page. Then you have to select a CTA button type from the box called ‘Cta button type’. The rest of the things are the same as others.
Comboposter:
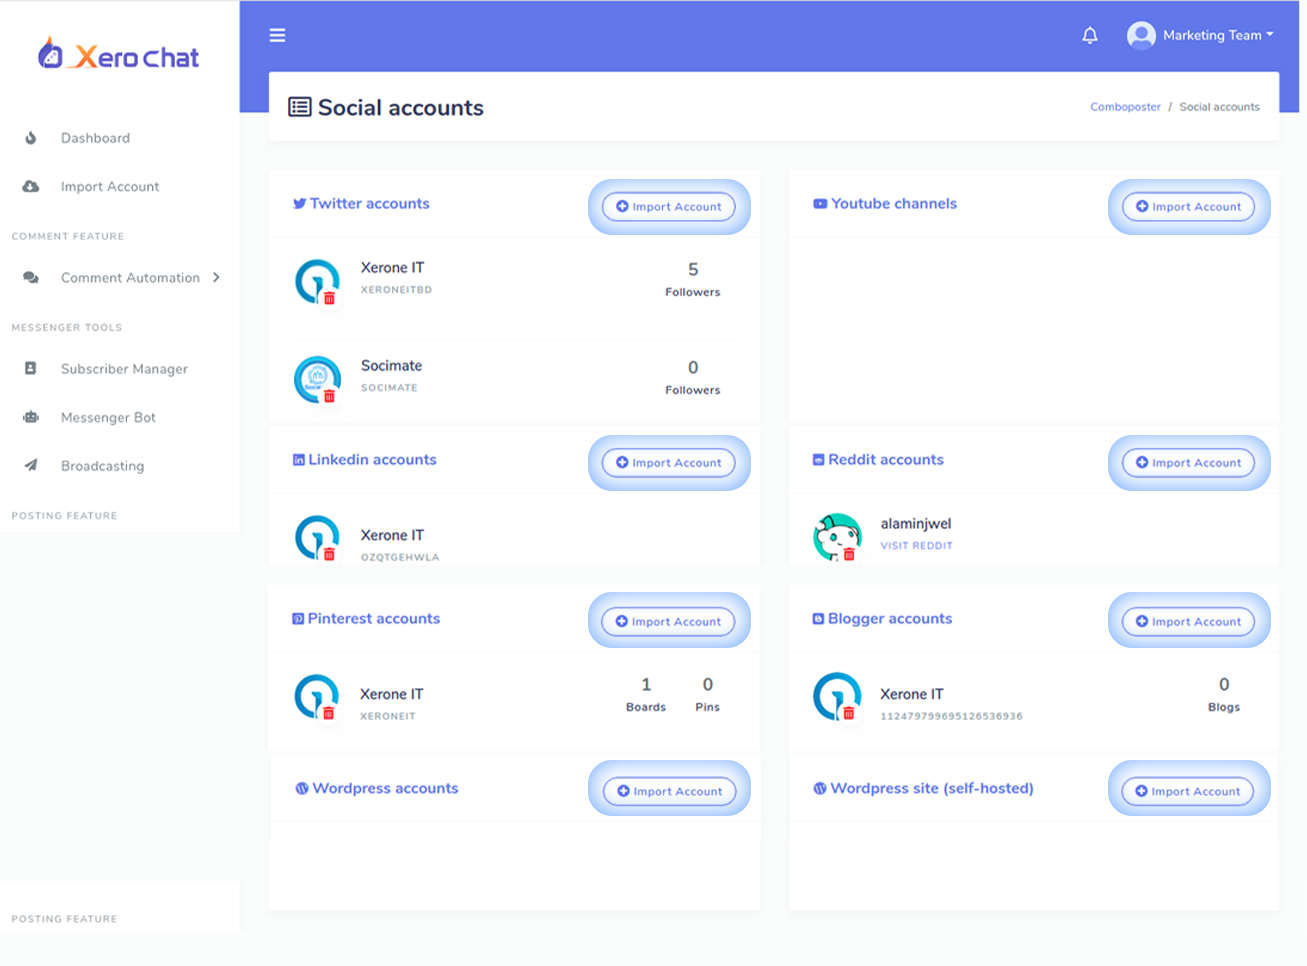
If you want to make posts on different social medias including Facebook, you have to use ‘Comboposter’. Beside comboposter, you will see a button called ‘import social accounts’. Just as you click on the button, a page called ‘Social accounts’ will appear. On the page, you can import your Twitter account, YouTube channels, LinkedIn accounts, Reddit accounts, Pinterest accounts, blogger accounts, WordPress accounts, WordPress site(self-hosted account).
How to use ‘Comboposter’:
With the ‘Comboposter’, you can make text post, image post, link post, video post, HTML post and auto post(Rss feed post) on different social media. Here, I will show you how to make image posts with ‘Comboposter’.
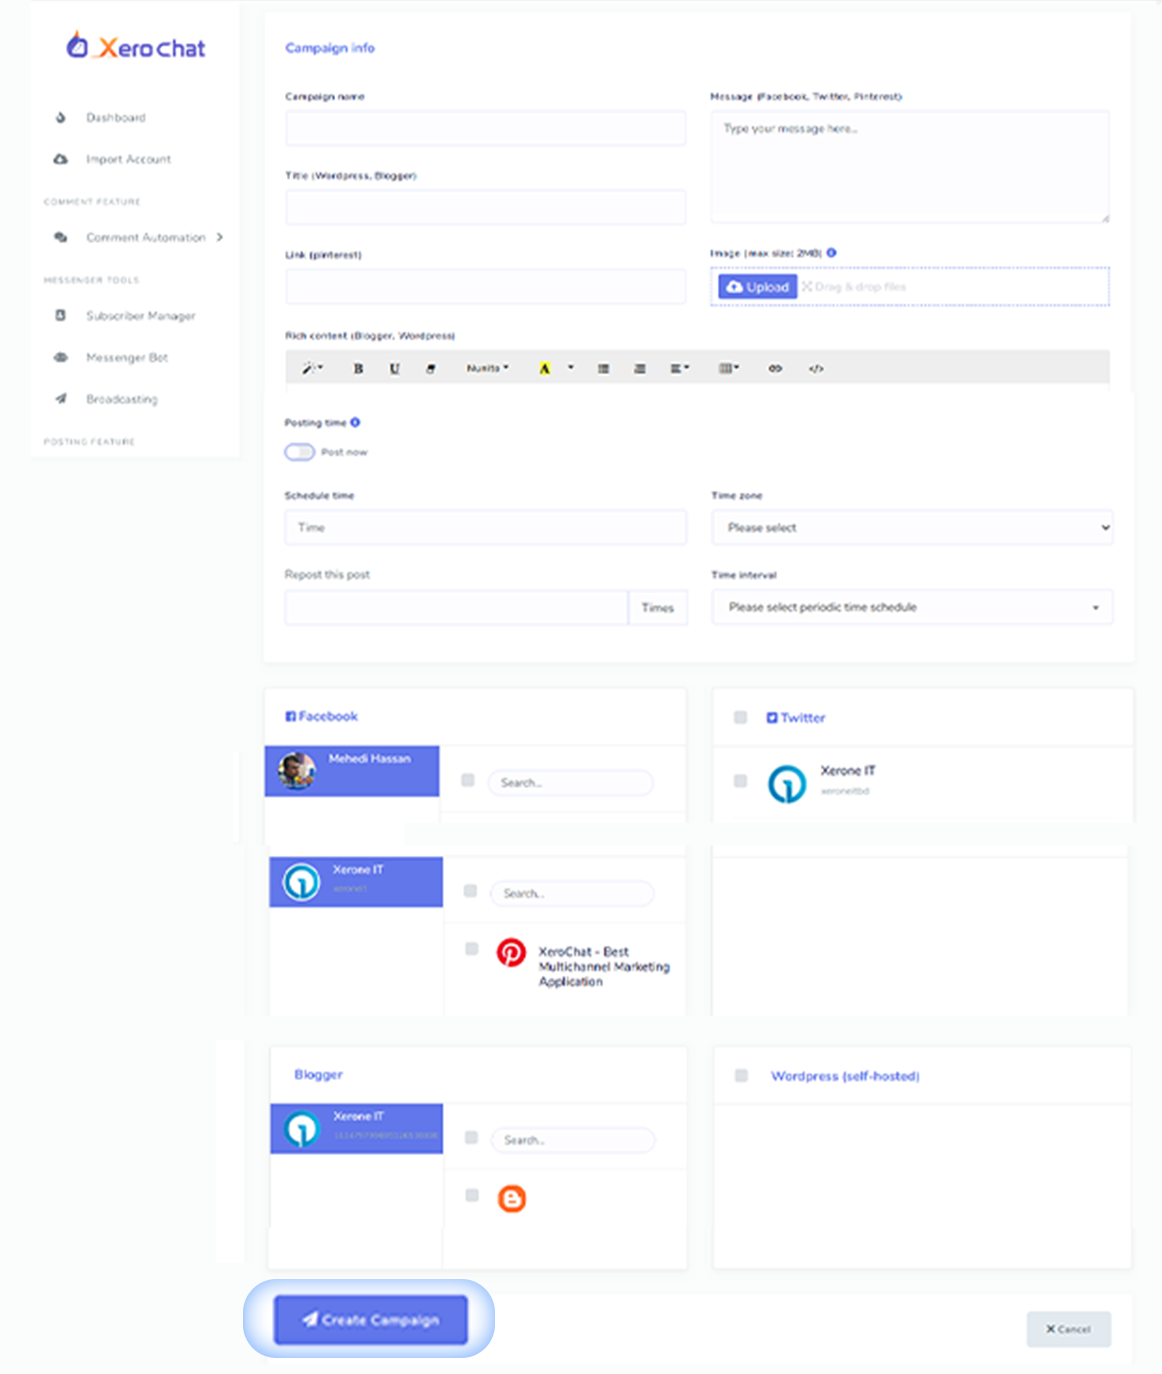
Click on the ‘campaign list’ under the ‘image post’, a form called ‘Campaign info’ will appear. You have to fill up the form. Write a campaign name on the box ‘Campaign name’. Then write a title for the WordPress and Bloggers. Then write a message for the post on Facebook, twitter and Pinterest. You can paste an action link on the box called ‘Link (Pinterest)– this is optional, you can also keep it blank. Then upload an image. You can also write a rich content for the post on Blogger and WordPress. Now select Facebook pages, Twitter and other social media. Now click on the ‘Create campaign’ button. And you are done.
After you click on the ‘Create campaign’ button, a page will appear where you can see all the campaigns— campaign names, campaign type, publisher, post type, status— completed or pending and schedule time. From here, you can see reports of the campaign, can edit, can clone, and can delete any campaign.
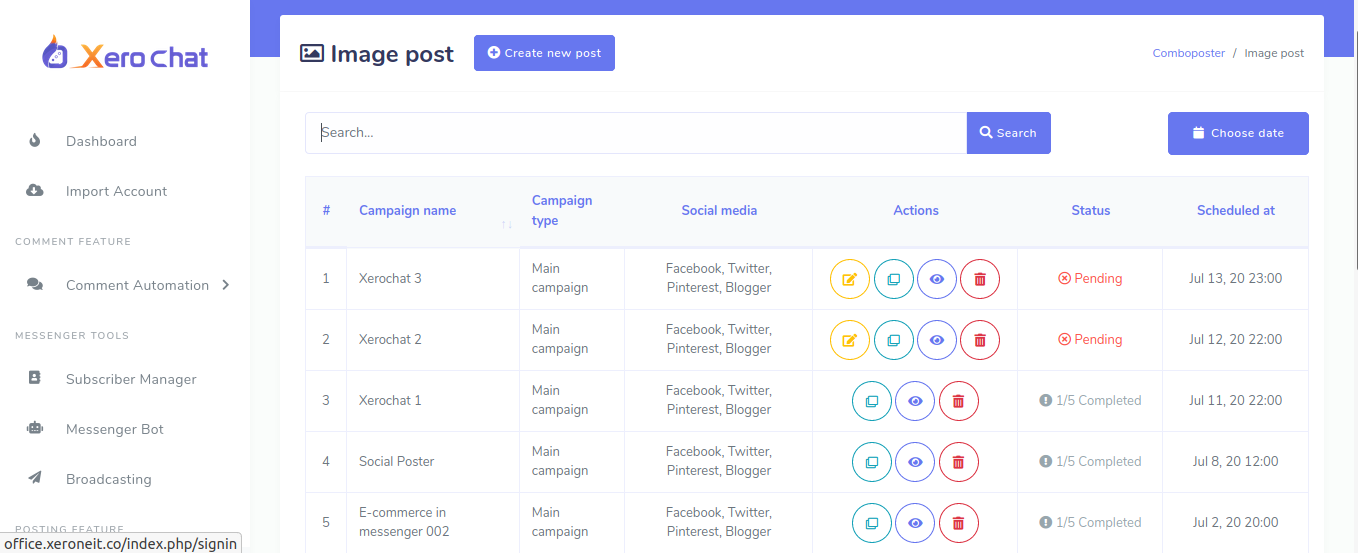
To see report of the icon, you have to click on the ‘Eye icon’ beside the campaign name. Just as you click on the eye icon, a modal called ‘Report of reposting campaign’ will appear. Here, you will see the main campaign and a list of subcampaigns— the name of the social media, their status and schedule time.
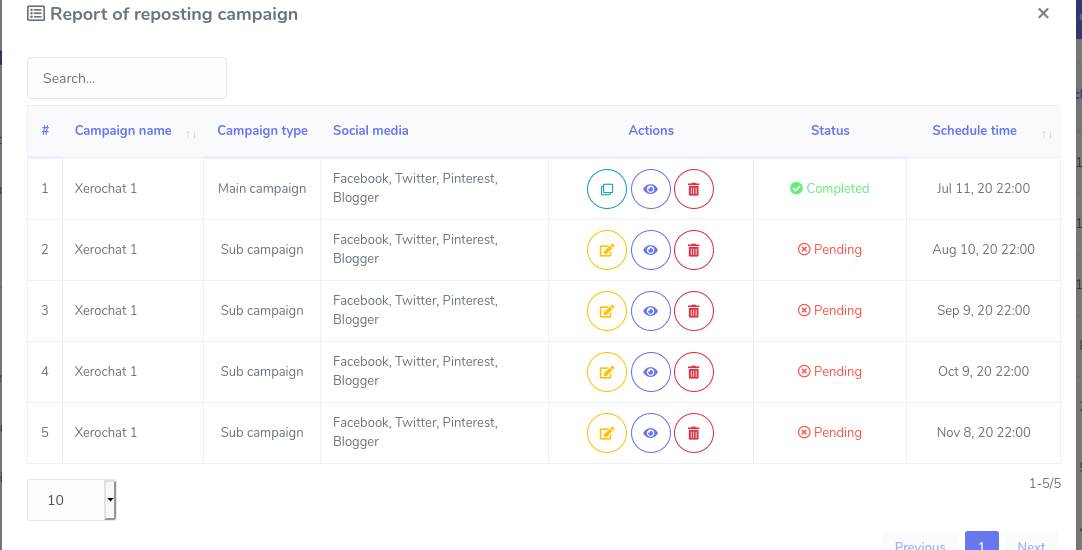
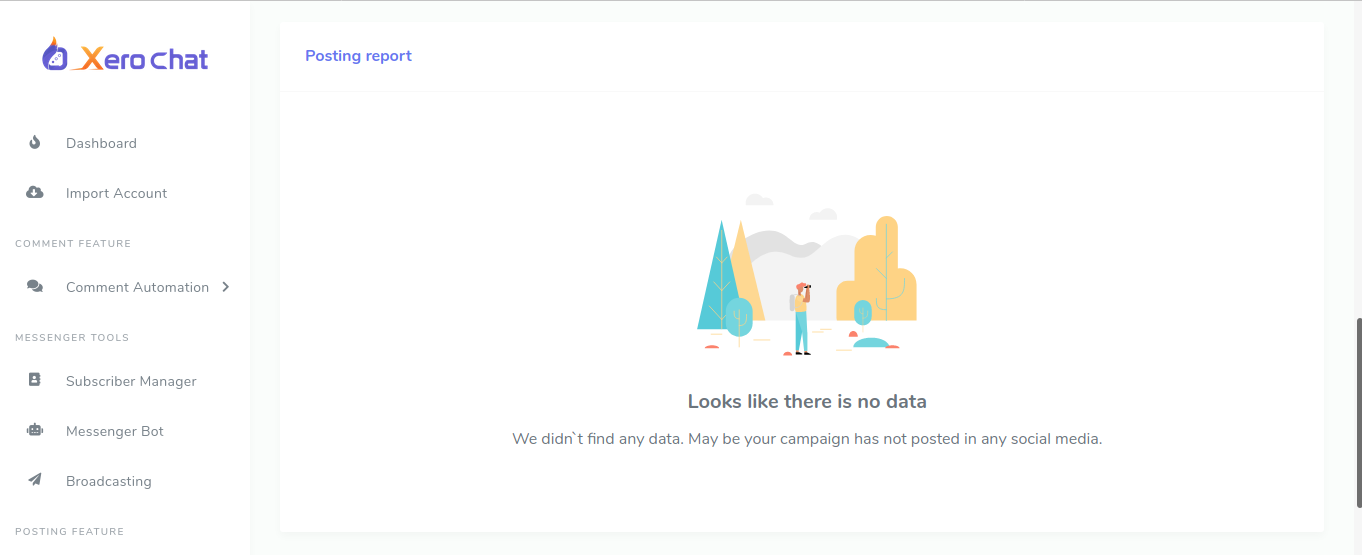
Now click on the ‘Eye icon’ to see the reports. Just as you click, a page called ‘campaign report’ will appear. Here, you can see the campaign report.
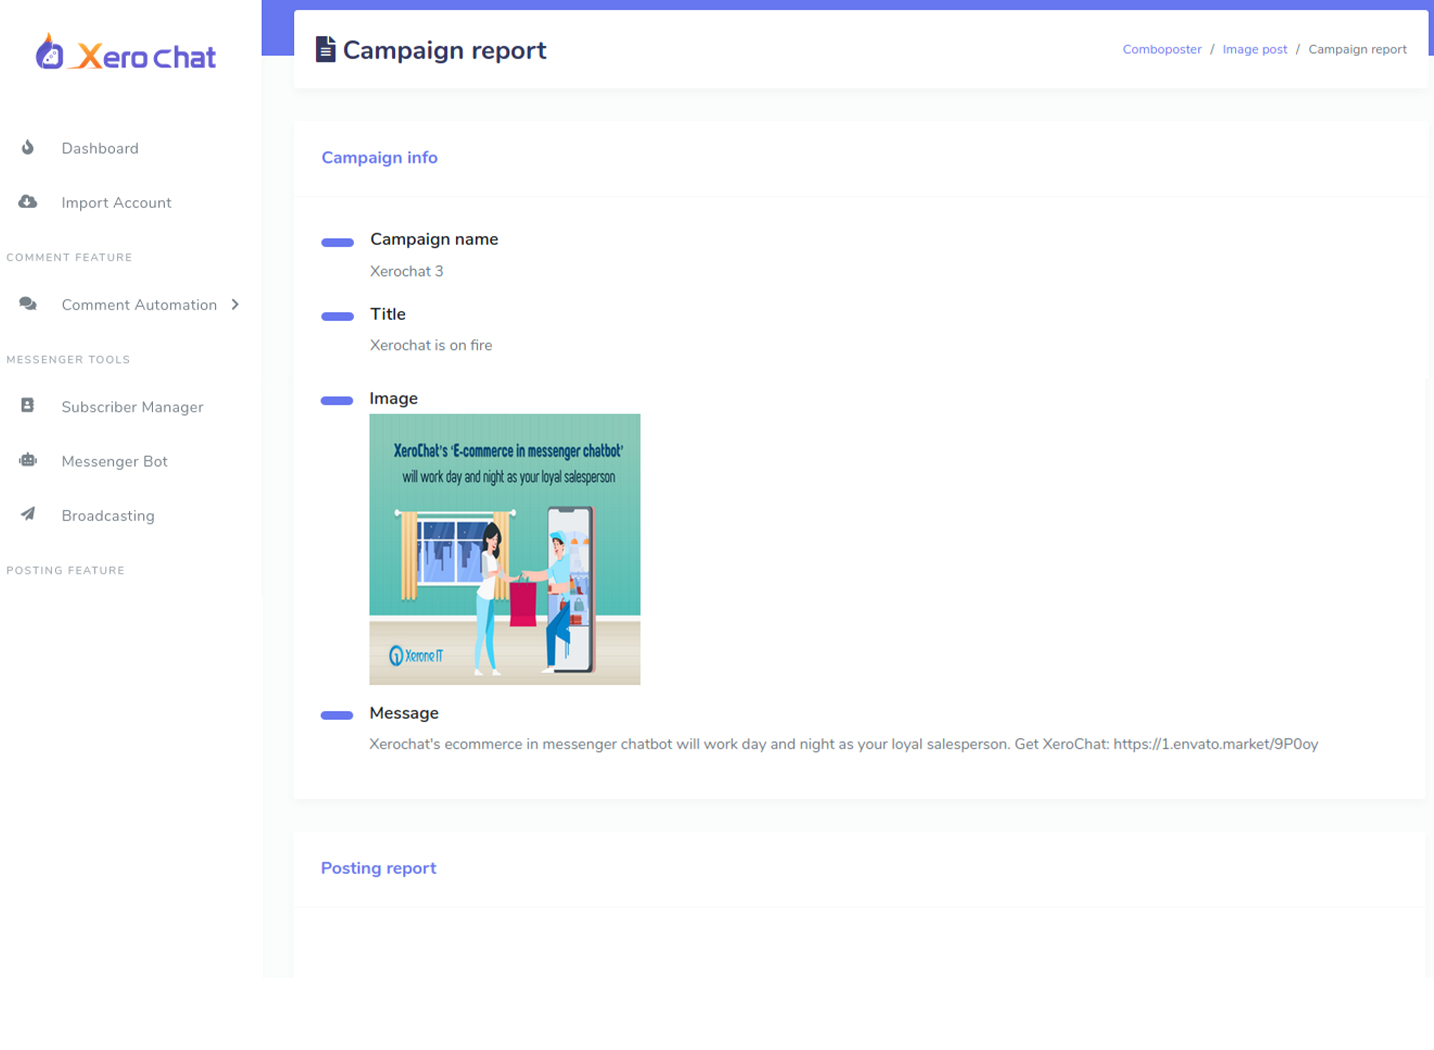
If you click on an ‘Eye icon’ of the campaign that is pending, you will see no data in the part of ‘Posting report’.
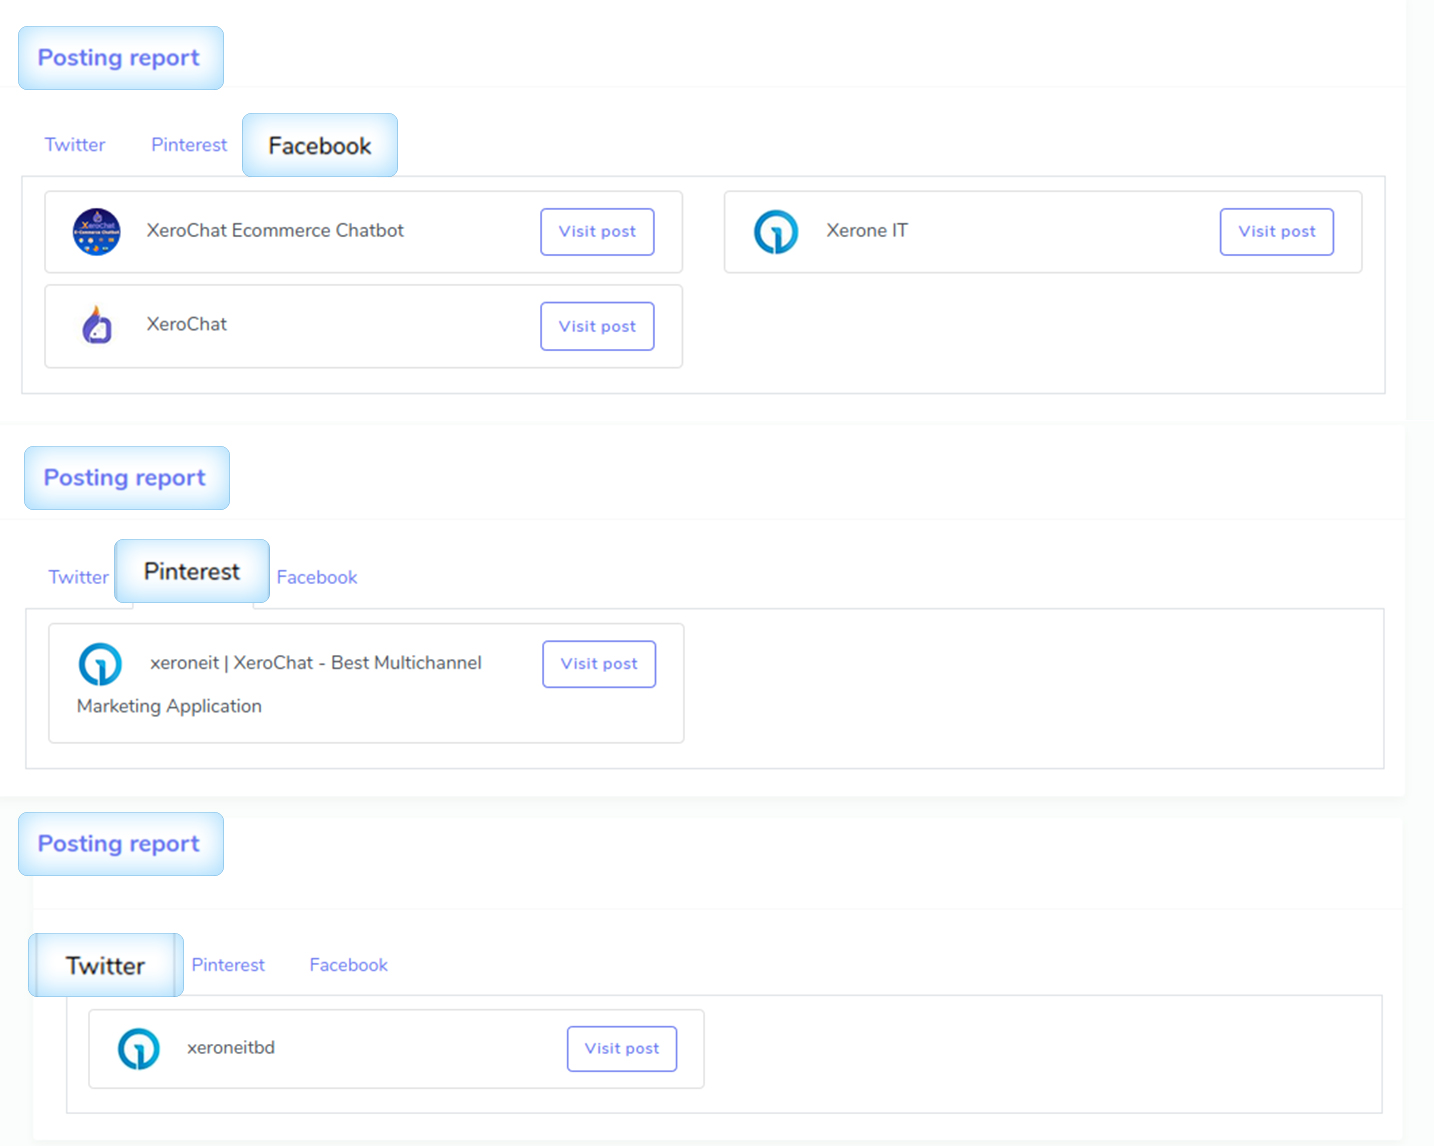
On the other hand, if you click on the ‘Eye icon’ of the campaign that is completed, you will see the posting report on different social media.
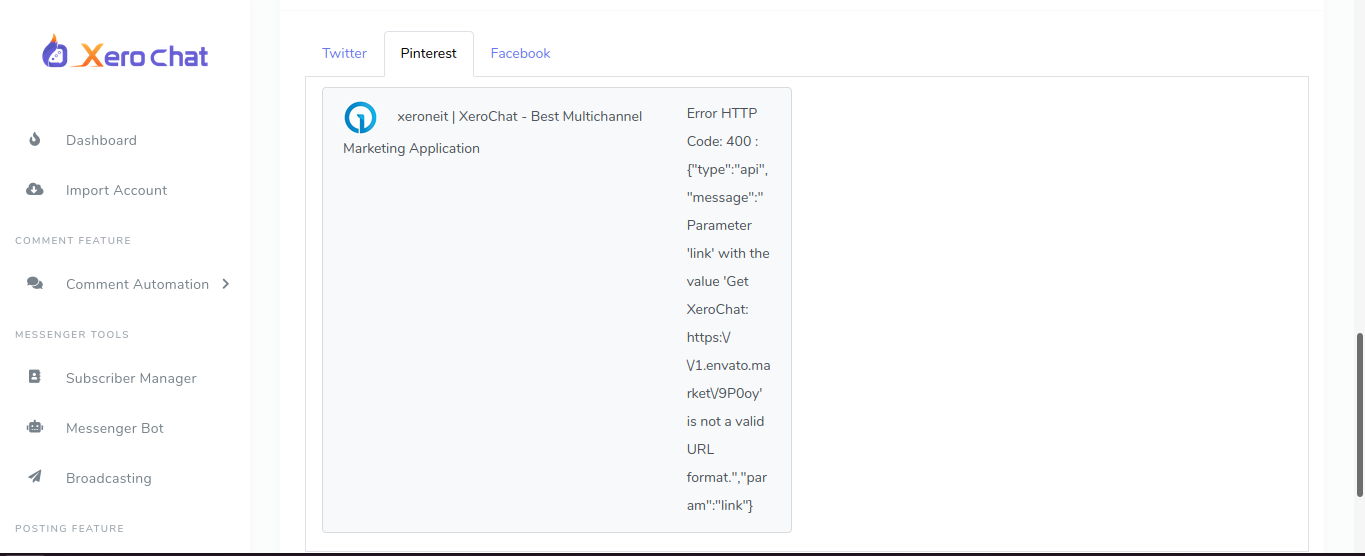
If a campaign is not posted, you will see an error report.
Thank you for reading the blog.

Its gr8 features , however after update to latest version with wordpress categories, its not posting anymore