What you will get in the Big Update of ChatPion
ChatPion has already secured its position as the world’s first multichannel marketing software. The application is composed of multiple unique and striking features and add-ons. To do online marketing of your products, you need to use the features and add-ons.
Moreover, ChatPion contains a multi-functional full Ecommerce platform that has all the features a general Ecommerce site has. The great news is that the Ecommerce platform is now a standalone feature—besides Facebook Messenger, it could be run on browsers. And you can create your Ecommerce store without selecting a Facebook Page.
The Ecommerce platform is now a standalone feature. It doesn’t depend on Facebook Anymore.
Well, every feature of ChatPion also has special interfaces on which you can make settings for the features. The interfaces have drag and drop facilities so that you can organize things very easily and smoothly
Also, ChatPion has a well-designed dashboard. You can easily navigate to different interfaces from the dashboard. In one word, ChatPion is highly user-friendly.
Nevertheless, the team of ChatPion is always working to make this application more effective than ever, adding new features, presenting new add-ons, and increasing the overall functionalities.
In continuity, ChatPion has recently released ChatPion v5.30. In the big update, the functionality of some features, especially of the Ecommerce platform, has vastly increased. Likewise, the interfaces of different features have become more user-friendly.
In this very blog, I am going to discuss all the things the update has presented.
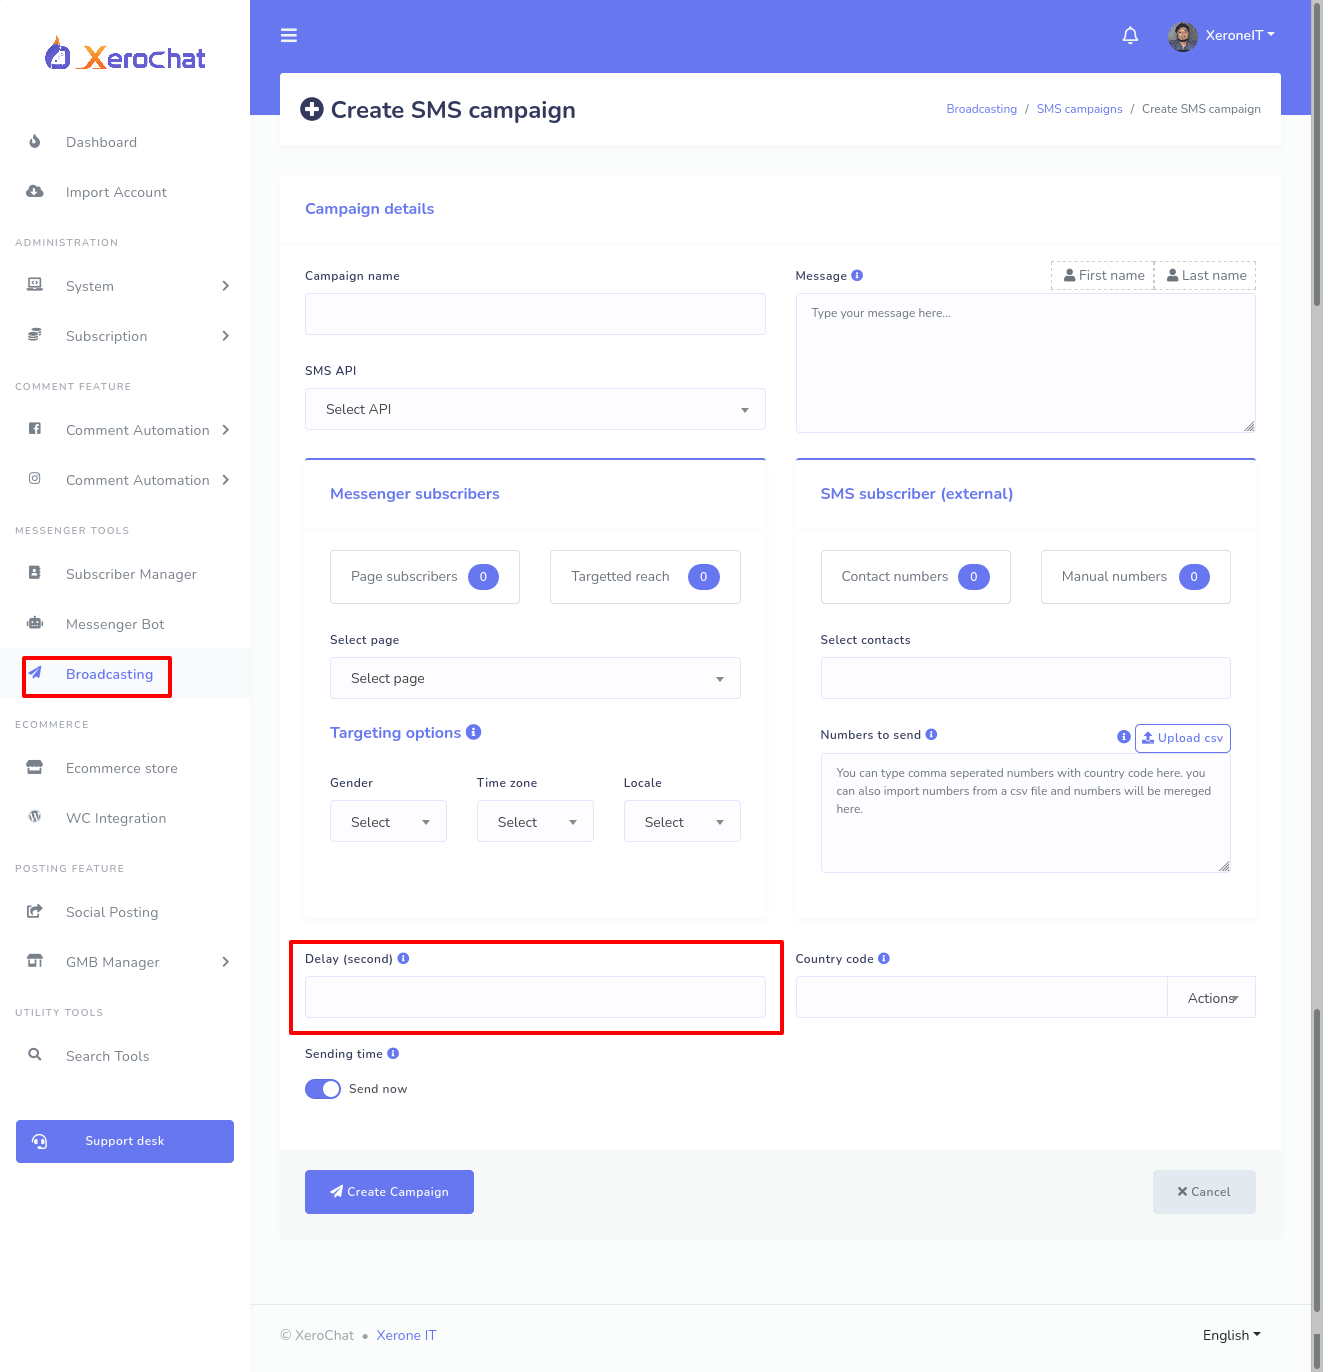
1. SMS broadcasting Delay option:
Now you will be able to set delay time in seconds for sending bulk SMS while creating SMS campaign in the broadcasting feature of ChatPion.
2. User Input Flow Campaign Export and Import:
User Input Flow and Custom Fields, a striking feature to collect information from users, has recently been presented. It collects information from users while talking to them without telling them to click on a quick reply button or fill-out a webview form. Therefore, it can collect real-time information.
Well, to collect information from users, you need to make a campaign with a Facebook page. Then you have to add the campaign to a bot setting. And you can easily Export a bot setting from one Facebook Page and import the bot setting to another Facebook Page.
In the updated version of ChatPion, the campaign of User Input Flow can also be exported and imported with the bot setting.
3. Creating a carousel of products in the messenger bot easily:
On the bot settings, you can create a carousel of products added to your Ecommerce store. In the messenger bot settings, you have to select Ecommerce as the select reply type. Then select the Ecommerce store. After that, you have to select products from a drop-down list of all products of the store.

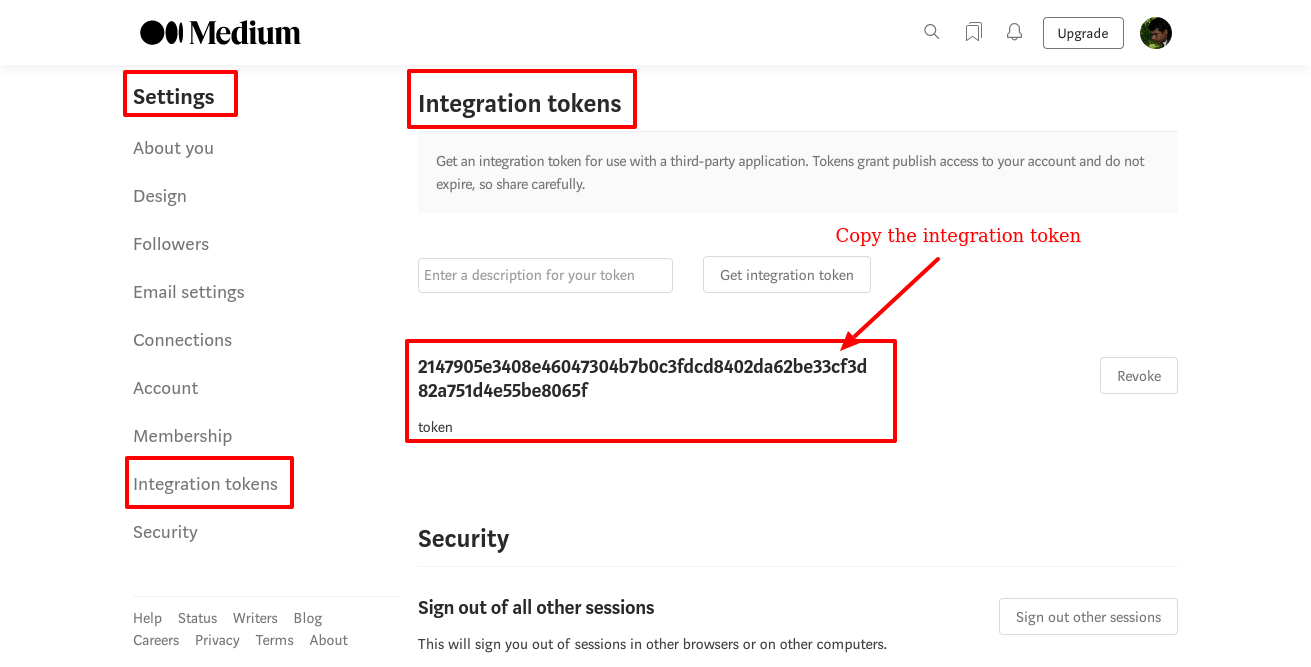
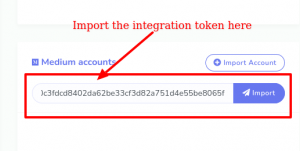
4. Importing Medium account with integration Token:
ChatPion has a feature called ‘Social Posting’ that automatically makes multimedia posts on different social media including Medium.
First, the social media accounts need to be imported to ChatPion to create campaigns on Social posting. Now you can easily import your Medium account to ChatPion by providing an integration token of a Medium account. You just have to copy the user integration token, then you have to paste the integration token in the interface of the ‘Social posting’.
5. The issue in posting on LinkedIn settled:
Of course, ChatPion’s ‘Social Posting’ can make posts on LinkedIn. In the Big Update, the minor issue, relating to text formate, in making posts on LinkedIn has been solved.
The big update also comes with a bunch of new functionalities of Ecommerce stores. Besides, the interface of the feature has become more user-friendly and flexible.
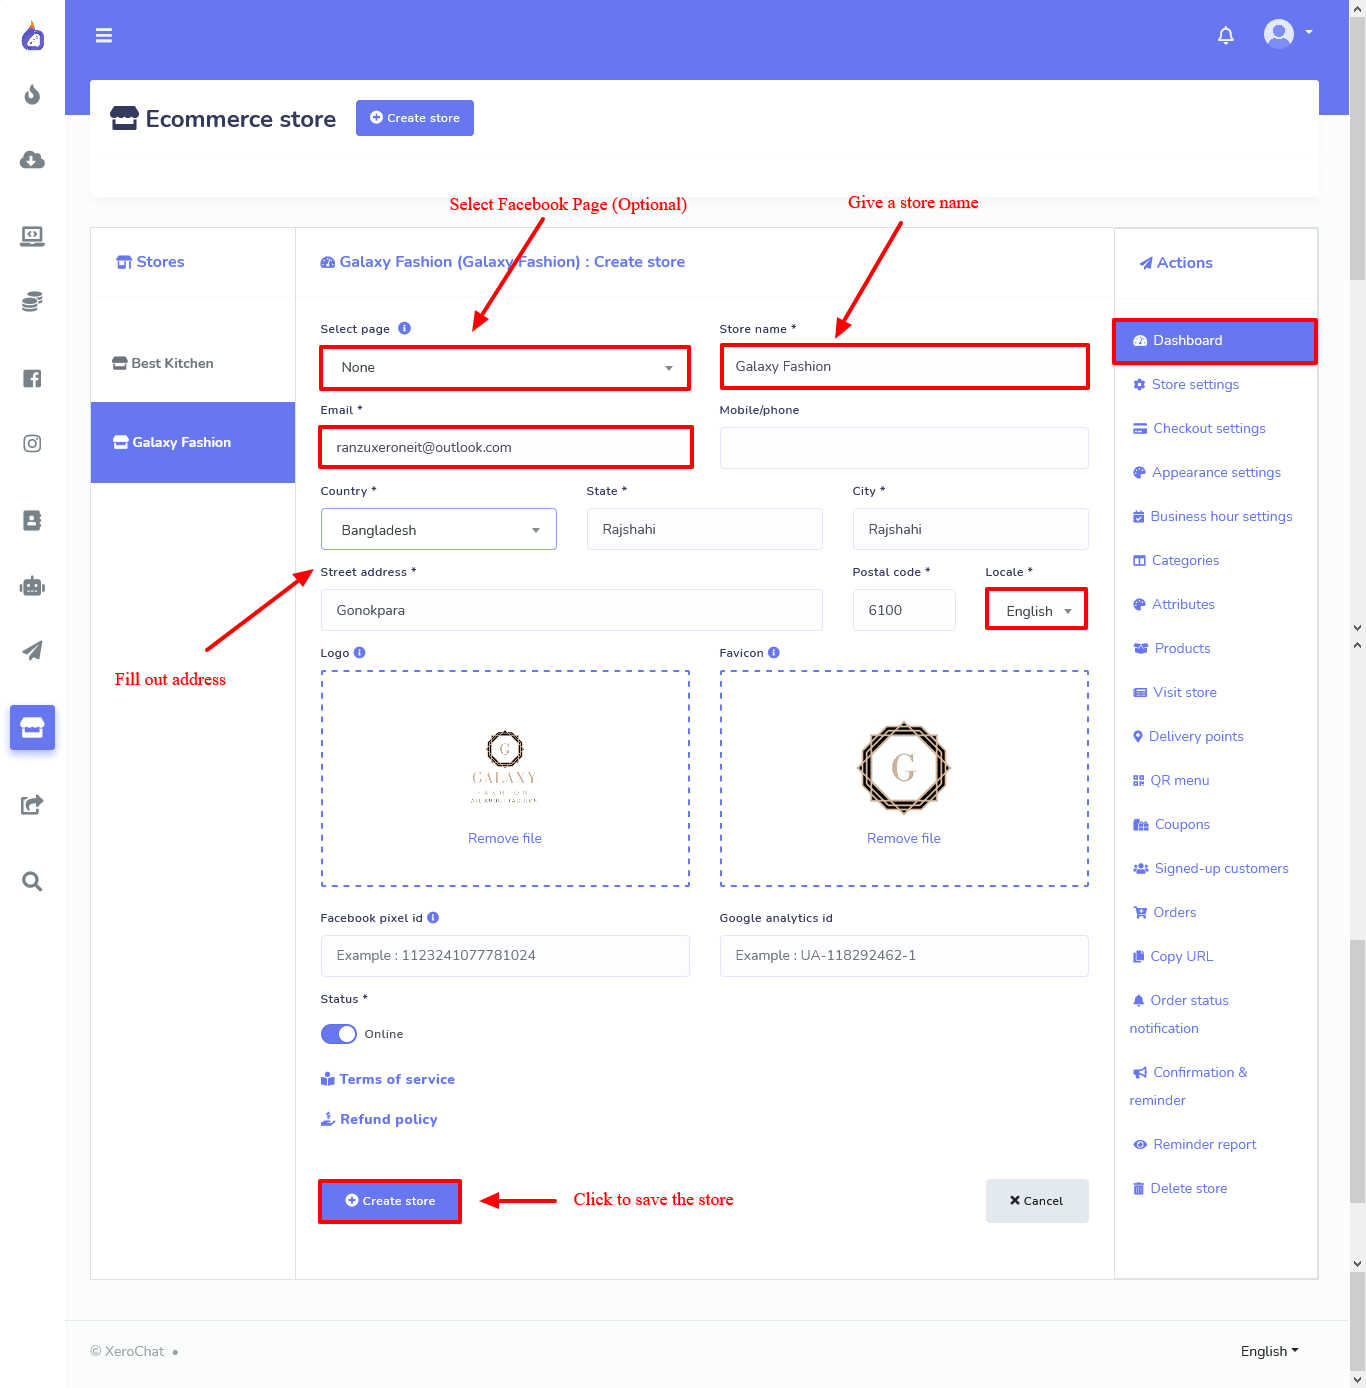
6. Facebook Page is optional to create an E-commerce store:
ChatPion’s Ecommerce store now is a totally standalone feature. It no longer relies on Facebook. You can create an Ecommerce store without selecting a Facebook Page. Then your Ecommerce store will be created for only the browser.
No need to mention, you can select a Facebook page while creating an Ecommerce store. In this case, the store will be created for both Facebook Messenger and Browser.
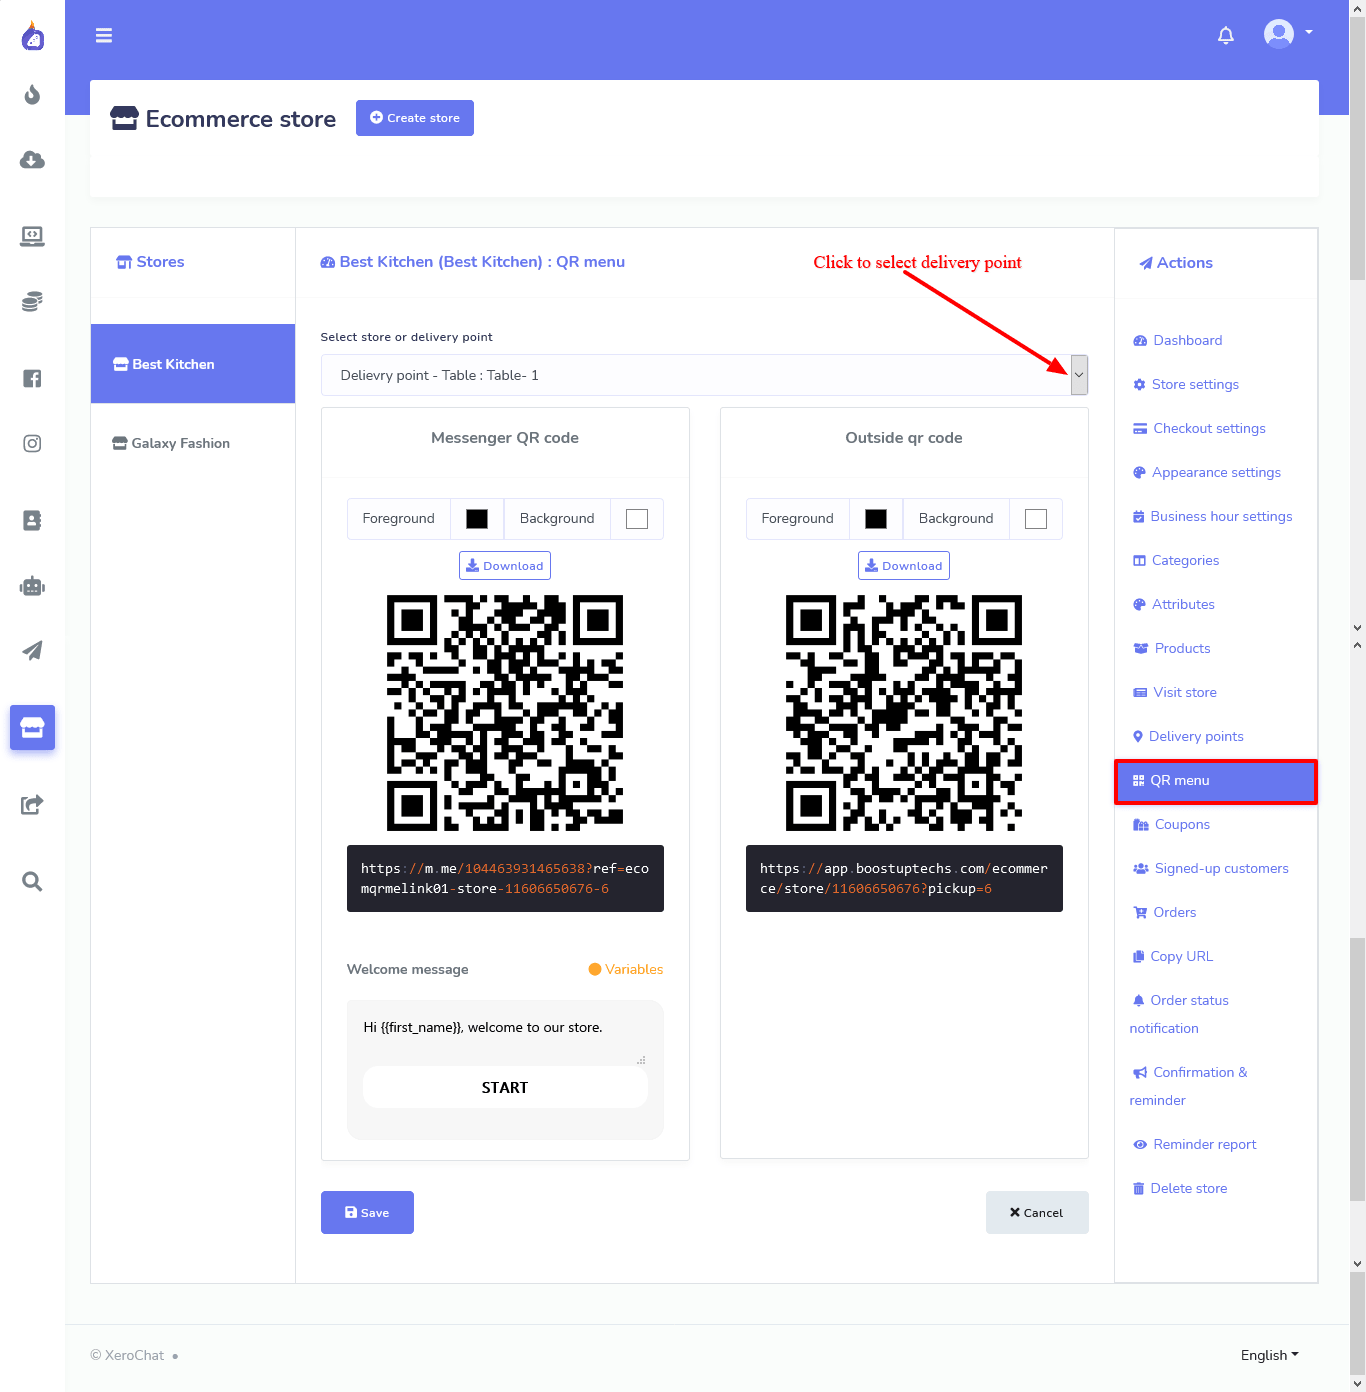
7. Specific QR code:
Now ChatPion can generate specific QR codes for delivery point details. As for the digital menu, it can generate QR codes for a specific table. That is, a customer sitting at a table doesn’t have to select the table number while ordering food.
On the other hand, for the Ecommerce store, the customer doesn’t need to select the counter number from where they have to pick the product.
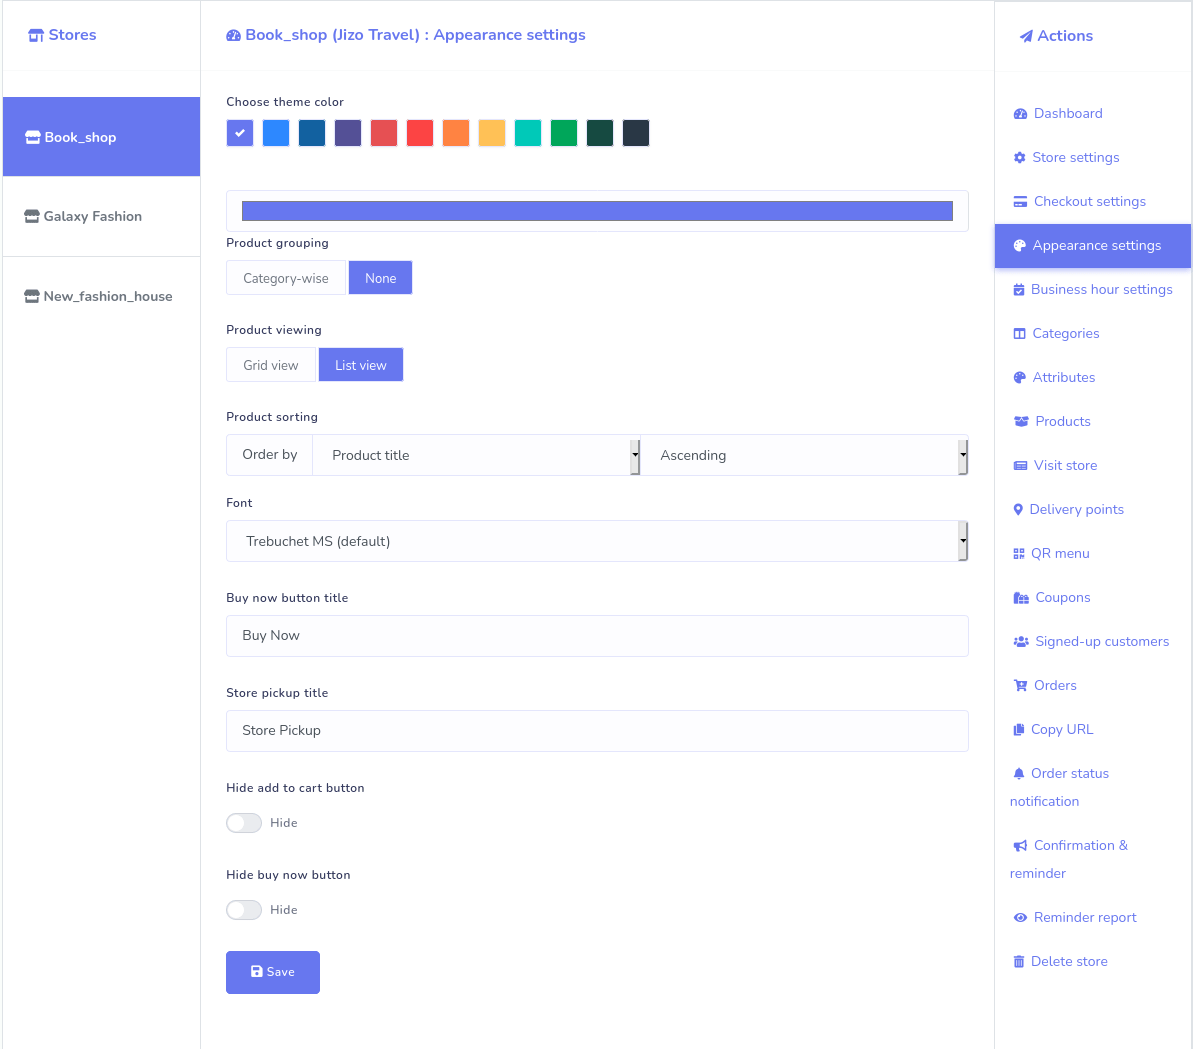
8. Appearance settings:
Now you can change the default appearance of ChatPion’s Ecommerce store. The big update comes with an Appearance setting option so that you can change the default appearance of your Ecommerce store.
Let’s see what you can change:
a. Changing the default color:
You can change the default color of your store to your favorite color. You just have to pick your favorite color from a color picker.
Please watch the video tutorial for details.
b. Changing the default font:
As well, you can alter the default font for your Ecommerce store. You just have to select your favorite font from a drop-down list— Arial, Garamond, Georgia, Helvetica, Tahoma, Times New Roman, Trebuchet MS, and Verdana.
c. Product grouping:
You can group your products in either category-wise or not category-wise.
d. Product viewing:
Also, you can display your product in either of two ways— List View and Grid view. You just have to select the desired view.
e. Displaying products in multiple ways:
The products of your store could be displayed in multiple ways— Product title, New product, Price, total sales, and random in either ascending or descending order.
f. Changing the button title:
You can change the button title for Buy Now and Store Pickup button. Simply put, you can rename these two buttons.
g. Hiding Add to cart and Buy Now button:
Now you can hide the Add to cart and Buy Now button.
Some customers want to use the digital menu only for choosing the food items— they like to give orders via the waiter and pay to the manager directly. Therefore, for this type of customer, you can hide the Add to Cart and Buy Now buttons.
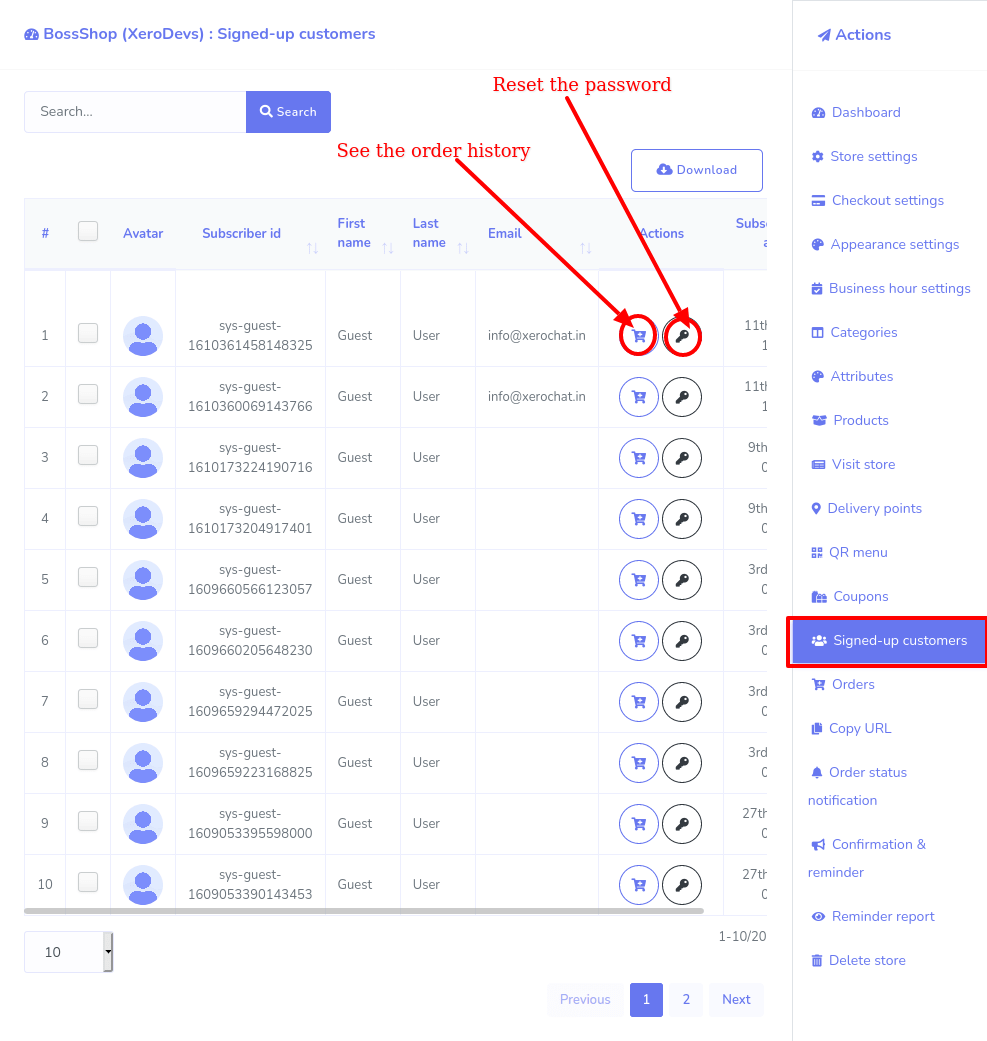
9. List of signed-up customers:
Now you can see the list of signed-up customers that signed up and logged-in to buy products from your Ecommerce store. On the list of signed-up customers, you can reset the password on the behalf of the customers and see their order histories.
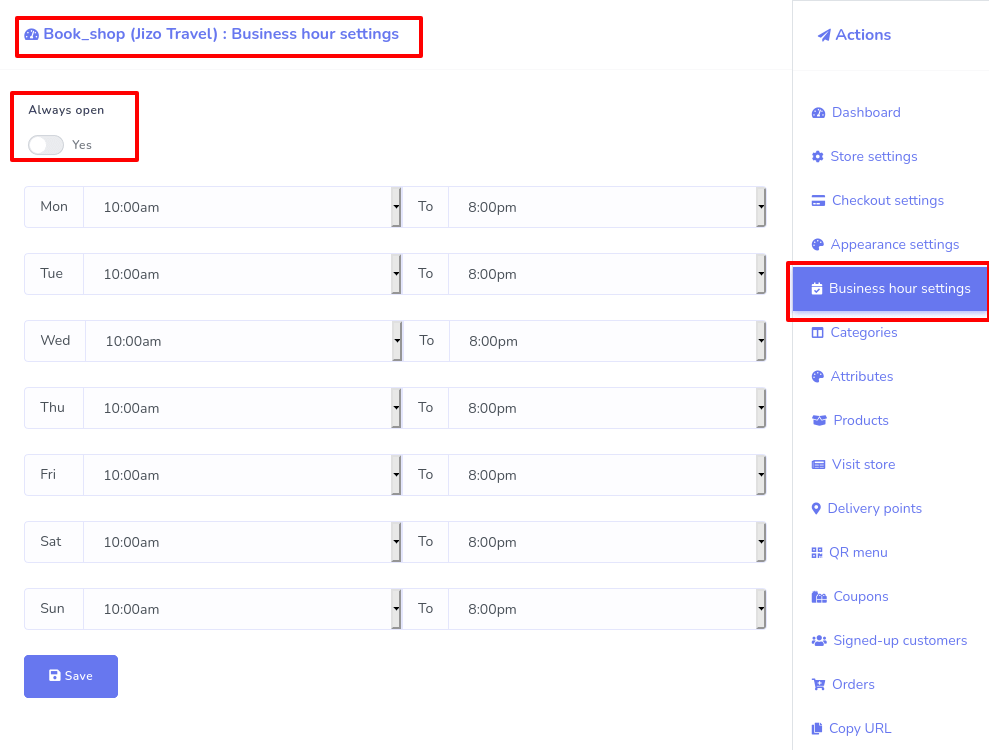
10. Business hour setting:
Now you can set the business hour— opening and closing hour— for your Ecommerce store very easily from the business hour settings.
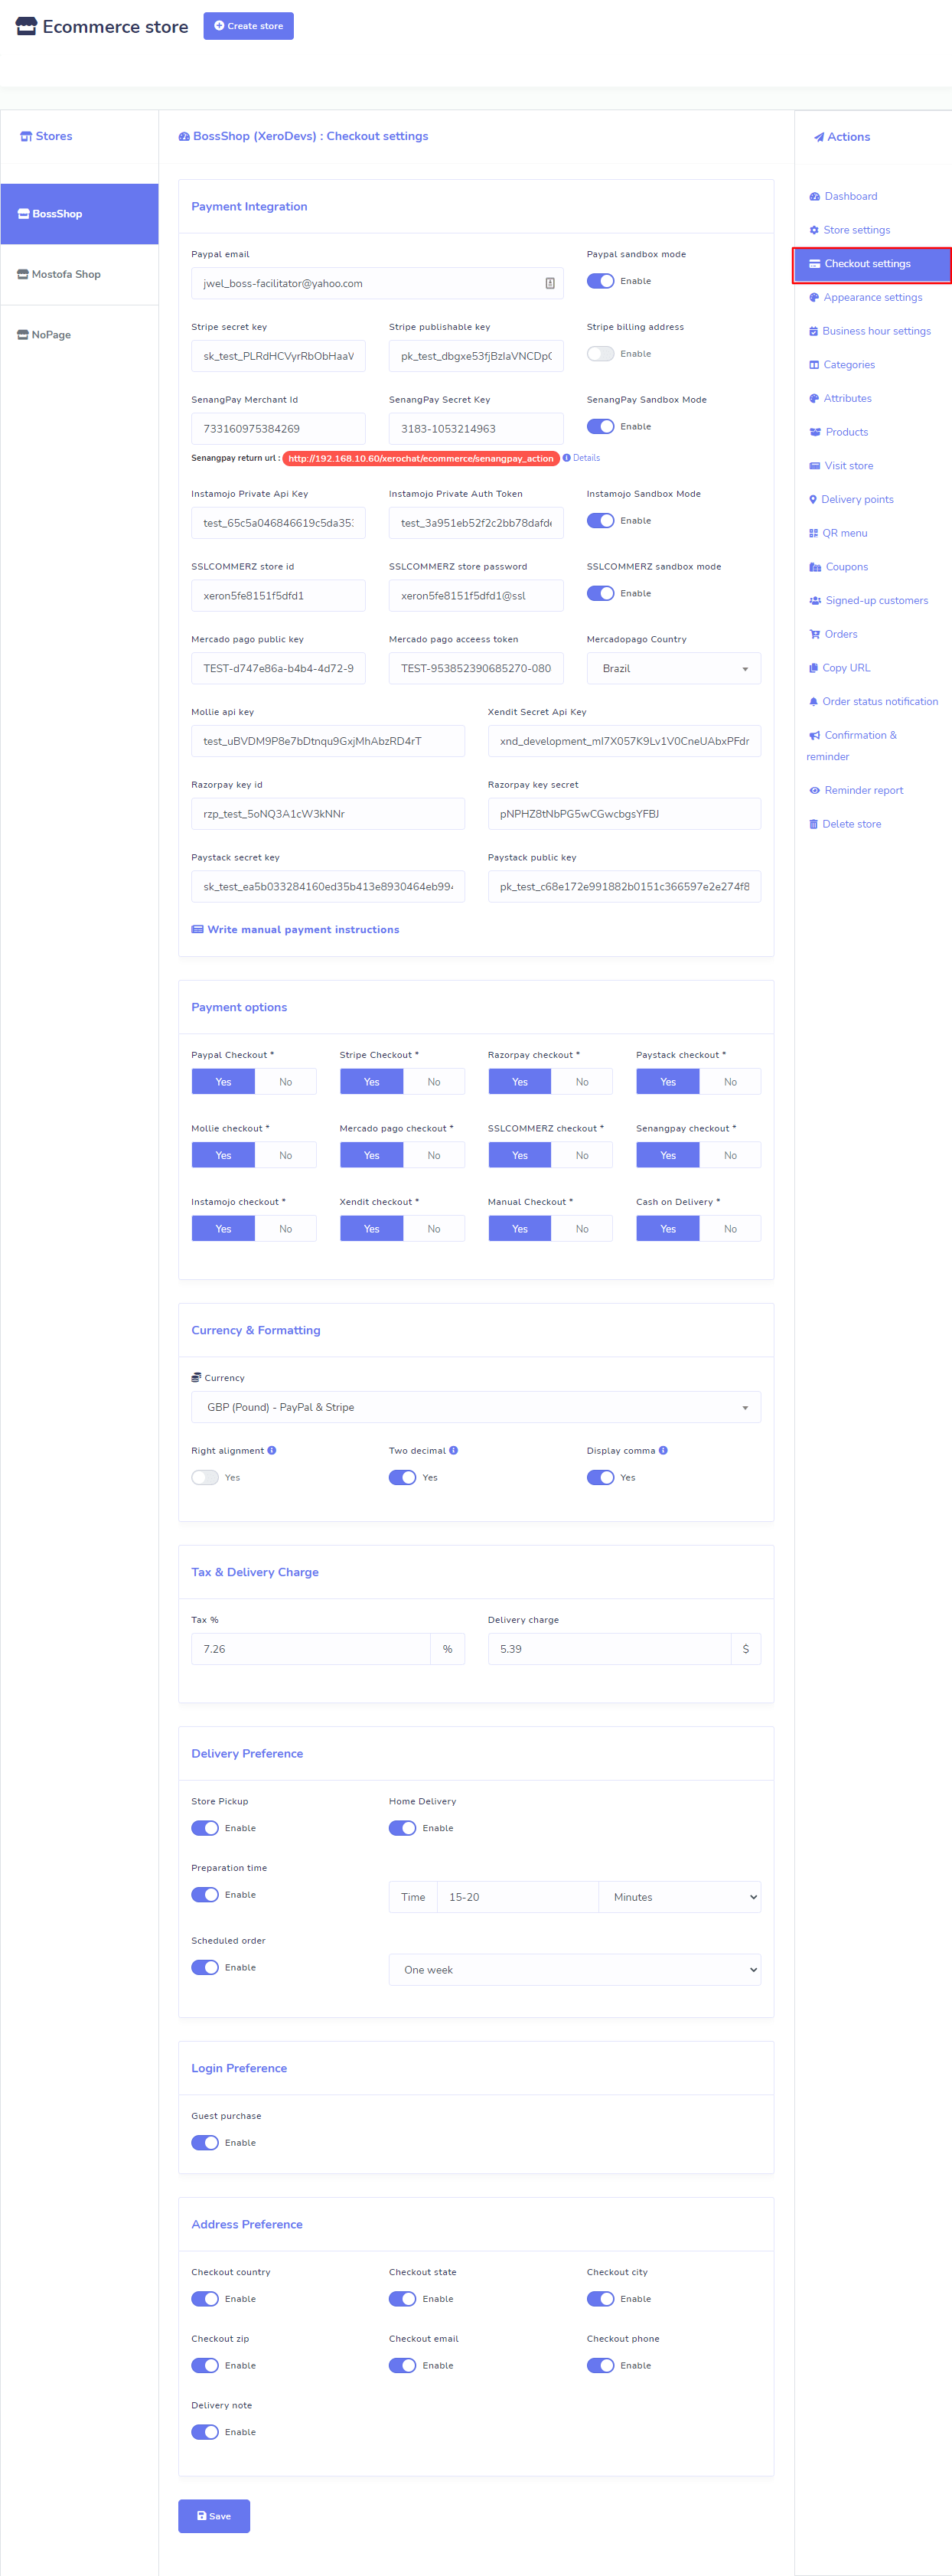
11. Checkout settings are more flexible than ever:
a. Five more Payment Gateways added:
Five more payment gateways have been added to ChatPion in the updated version. Now the total number of payment gateways in ChatPion are 10— PayPal, Stripe, Mollie, Razorpay, Paystack, Mercado Pago, and SSLCOMMERZ, SenangPay, Xendit, and Instamojo.
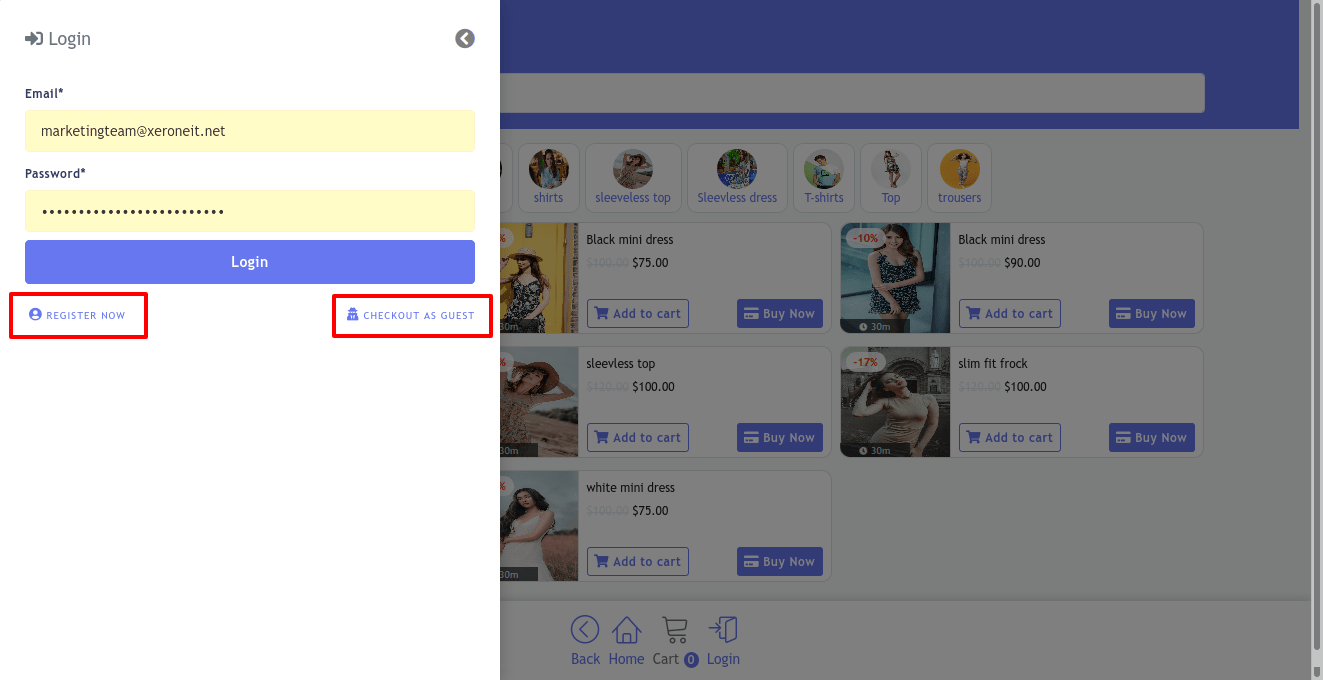
b. Guest purchase:
Now you can enable the guest purchase on the checkout setting by enabling a radio button.
Well, if you enable guest purchase, customers can enter the Ecommerce store on the browser and give orders for food or purchase products without logging in, as a guest.
c. Schedule order:
The big update comes with an option so that you can enable schedule order and select a period from a drop-down list— Only today, today, and tomorrow, one week, and any.
Well, if the scheduled order is enabled and a period is selected, a customer can schedule an order in that period you have selected.
d. Preparation time:
You can set the preparation time for all of your products. Setting preparation time is useful for the digital menu of a restaurant. Most of the food items need to be cooked or prepared after an order has been placed.
If you set a preparation time, the time will be visible on the image of the product or food items. Therefore, a customer knows beforehand how long they have to wait.
e. Enable/Disable Home Delivery and Store Pickup:
Now you can enable/disable Home delivery and Store pickup options. If you don’t have a restaurant and you only give home delivery, you can have to disable the store pickup option. Contrarily, if you have a restaurant and you don’t give home delivery, you have to disable the home delivery option.
On the contrary, if you have a restaurant and you give home delivery, you have to enable both Home delivery and the Store Pickup option.
12. Category Image:
Now you have the option to upload thumbnail images for categories. True, the images will be shown up in the navigation bar of categories.
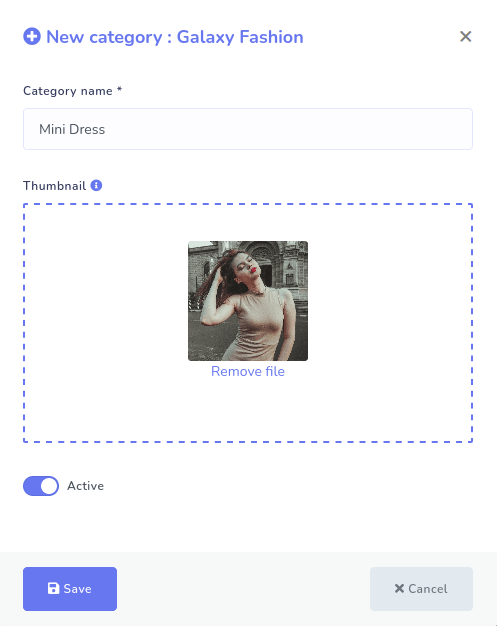
The categories will hold the category images.

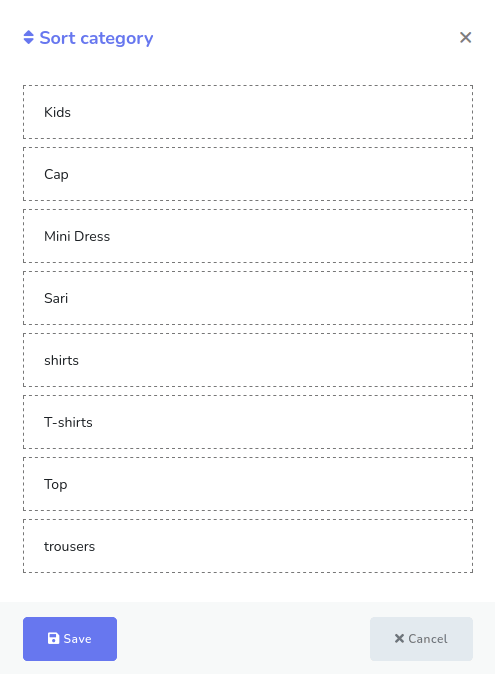
13. Rearrange categories:
If the category-wise display of products is enabled, you can rearrange all the categories by dragging and dropping.
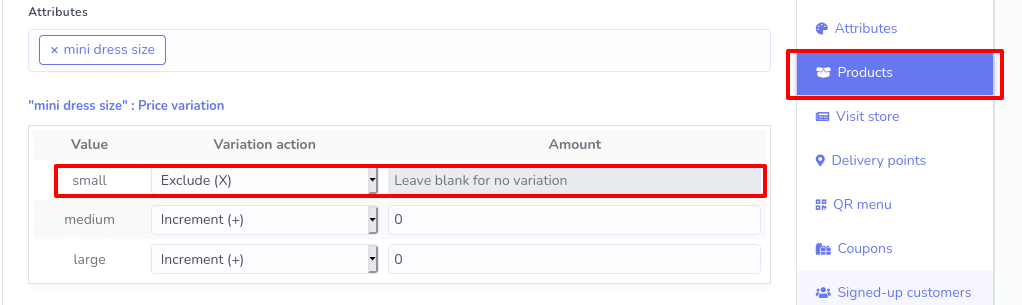
14. Product Attribute value Excluded:
After an attribute has been added to a specific product, the attribute shows every attribute value. But sometimes, a product doesn’t have every value, or the item for the specific value has been sold out. Such as, you can have size attributes with different values— S, M, L, XL, XXL. What if pants of XL size already have been sold out. In the Big Update, the problem has been solved. Now you can easily exclude the XL size value for the pants. That is, you can exclude any attribute value if you don’t need the value for a specific product.
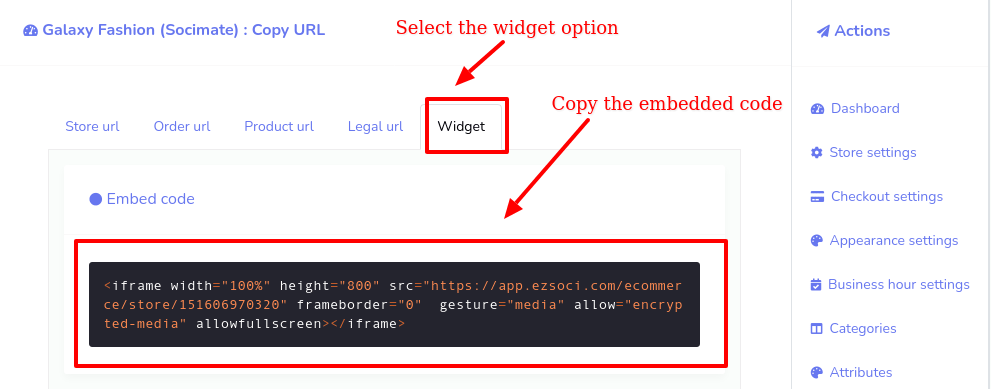
15. Ecommerce Store on other websites:
After you have made your Ecommerce store, you can set the store on your websites. Your Ecommerce store will generate a snippet of embed code, and you have to copy the embed code, then have to paste it into the HTML file of your website.
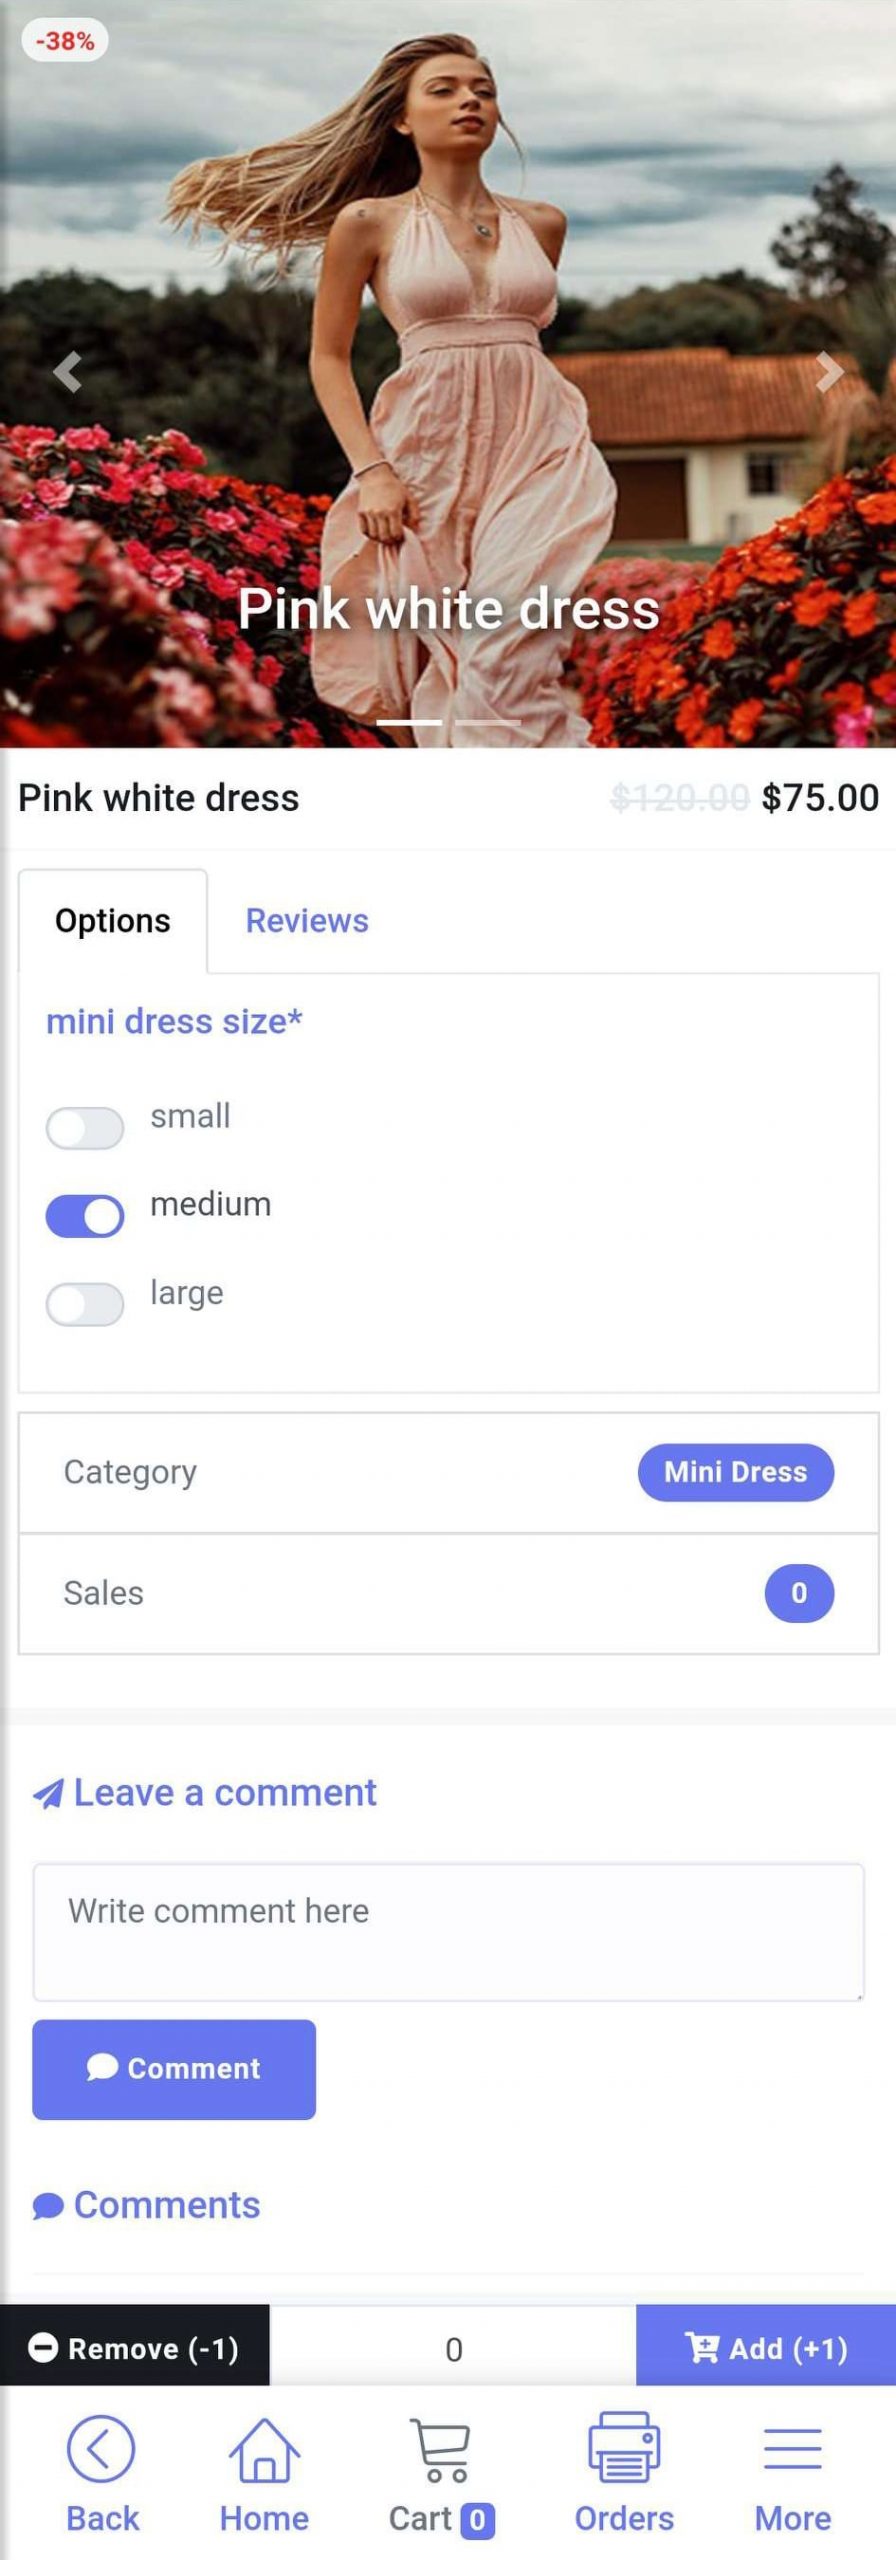
16. Product Single page image:
Now the product single page on the store looks more attractive.